
Traditional pâte sablée (pronounced “pat sa blee”) is a tender French pastry dough (closer to a cookie) that is usually a little sandy in texture and not flaky. Pâte Sablée translated from French to English is “dough sand” or “sandy dough”. The recipe calls for confectioners’ sugar instead of granulated. When using traditional all-purpose flour, the recipe calls for one part butter or fat and two parts flour. Egg yolk is sometimes added. Its tenderness is perfect for tarts as there is no need for a sturdy crust in tarts since they are very low in height.
Is the Gluten Free Version Sandy?
This gluten free version is not sandy at all. The starch used in my all-purpose flour blend recipe prevents that sandy texture. If you really want a sandy texture, use a higher ration of superfine rice flour and less of the starches. However, the crust will turn out a little heavier. Pâte Sablée may just turn into your go-to tart crust. It is certainly mine.
What Do I Do Differently to Make Gluten Free Pâte Sablée?
Because gluten free flour absorbs more liquid than traditional all-purpose flour, either use less flour or additional butter and/or liquid. In the recipe I developed, instead of using an egg yolk, which some recipes call for, I used additional butter. This way, you won’t need egg yolk (which helps in browning, as does dairy). However, due to the dairy in butter along with the fat, the dough still browns nicely without egg yolk.
What Ingredients Do I Use to Make Dairy-Free Pâte Sablée?
Because you will not be able to benefit from the browning of dairy in butter, you’ll need to substitute at least 1 tablespoon of fat for 1 large egg yolk.
For the fat, you can use half coconut oil and half organic palm shortening, or better yet, all (non-organic) hydrogenated palm oil along with 20% water.
When using coconut oil, you’ll need to substitute 20% of the fat with water or 25% with full-fat coconut milk. The cream in the coconut milk helps soften baked good much like butter. See the explanation and chart in Lesson 10: About Butter.
Earth Balance, the makers of dairy-free buttery spreads, offers Vegan Buttery Sticks. Many people rave about the sticks being perfect as a butter substitute when used for baking.
How Do I Make Pâte Sablée?
There really isn’t a lot more to tell you about this crust, but because we haven’t gone over the how-to’s of pie crust making, I’ll take this opportunity to thoroughly cover the subject.
- Thoroughly combine the almost room temperature (65⁰F is ideal) butter or fat(s) and confectioners’ sugar in the bowl of your electric mixer. To cream butter and sugar or combine dough ingredients, always use the paddle attachment of your mixer, if you have one. The balloon/whisk attachment beats air into batter and dough. You certainly do not want air in this dough.
- Add in one egg yolk, if using. Beat on low until combined.
- Add in the flour all at once. (You only add flour in a little at a time when you want a lighter weight crust or cookie.) Mix just long enough until the dough is moist, but not yet in one mass yet. You want to have pie dough in multiple pieces with a little bit of loose flour floating around. You never want to over mix it or you end up with tough pie dough. You’ll read on traditional baking websites and cookbooks that the gluten in the flour, when overmixed, creates a tough dough, but the same occurs for gluten free dough. Therefore, gums (xanthan, guar, etc.) in dough act in the same way. Psyllium husk powder (a gum substitute) does not create a tough dough. A matter of fact, psyllium husk powder softens dough, making it harder to handle/transfer to a pie dish.
- Gather the dough and transfer it all to a sheet of plastic wrap. Shape the dough into a round disk about 1 inch high. Wrap tightly with plastic wrap and refrigerate until firm enough to roll, up to one hour.
- The dough will be too firm to immediately roll. You’ll most likely need to let it rest at room temperature for 10 minutes or until you can easily pinch a piece off of the disk. You can then just distribute into the tart pan using your hands. If you wish to use the traditional rolling method and wish to roll it out immediately, start by pounding the dough with a lightly floured rolling pin. This will help prevent cracks. Then, roll the dough between two sheets of parchment or wax paper. You can test a small piece of dough out to ensure it doesn’t stick to the paper. Alternatively, you can lightly dust a silicone baking sheet with gluten free all-purpose flour or superfine rice flour and roll it out using a lightly floured rolling pin. However, the less flour you use, the better your crust will turn out. Roll the dough out into a circle large enough to cover the bottom, sides and a little over the edges of the dish to a thickness of 1/8-inch.
- Remove the top sheet of parchment/wax paper and discard. Dust the top lightly with flour. Then, wrap the dough around the rolling pin (dough side touching the pin) and then slowly unroll it over the tart pan/dish with the paper side up. Slowly and carefully remove the last sheet of parchment. Alternatively, transfer the dough using your bare hands. Gently lay it over the pan/dish and lift the edges so that the dough falls into the outer edges. Using your knuckles, push the dough into the pie pan/dish all of the way around. Depending upon the size pan/dish you use, you’ll most likely end up with additional dough all around the edges. Roll a flour-dusted rolling pin over the top of a fluted pan, which will automatically slice off any additional dough. Keep those scraps though! You may need some to patch up any tears that occurred during the transferring stage. It happens to the best of us. Cold dough helps prevent tears in most cases. For other tart dishes with thicker edges, slice off the excess dough using a paring knife.
- Patch up any tears in the dough by dabbing with cold water, add a little piece of dough, and dab with water again. Dust a little flour on top and pat again to seal. Alternatively, for moist dough, you can simply press the dough down on top of the crack.
- Because of the high ratio of butter to flour, this dough will simply fall down from the sides of the tart pan during baking if you allow it. So, you’ll need to prevent this. Line the entire bottom and up the sides of the dough with parchment paper. Add enough pie weights, dried beans, or uncooked rice (not instant) to fill the dish/pan. This holds the sides of the dough. Refrigerate at least 20 minutes. Alternatively, you can freeze the dough for 5 – 10 minutes.
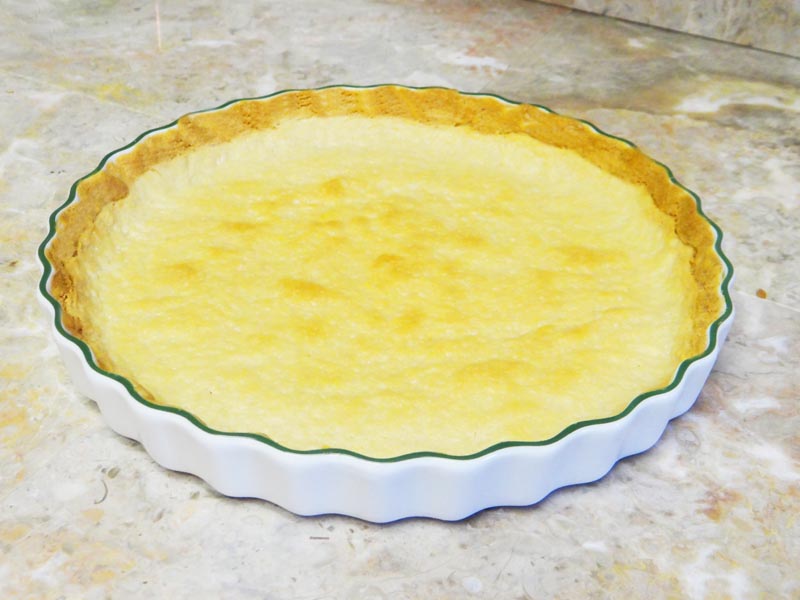
- While the dough chills, preheat the oven (425⁰F for my recipe) with a shelf in the center. If you plan on filling the crust with a filling that does not require baking, bake the crust fully; for my recipe, 22 – 23 minutes. Bake only halfway if the filling requires baking.
- Remove the crust from the oven and remove weights and paper. Rest on a wire rack until cool. Fill as desired if not already.
Summary:
Don’t let all of the above steps scare you or make you think making pâte sablée is difficult. I just like to provide as much information as possible for you to learn. Making pâte sablée can be as simple as mixing up all of the ingredients, wrapping it up and refrigerating, and spreading into a tart pan to bake.
Pâte Sablée is like shortbread, even heavier in butter than commercial shortbread cookies. Shortbread, like the kind they make in France and in fine restaurants, is nothing like American shortbread cookies. True shortbread falls apart when you pick it up. It’s that tender. So, be sure to use this crust in tarts, not pies that need a sturdier crust.
Did you know?
A dish is made of porcelain or glass and a pan is made of metal.
If you wish to show off a scalloped edge tart, the best pan to purchase is one with two parts where the sides are removable.
ASSIGNMENTS:
- Watch the Tender Pie Crust Video. It’s a different recipe but illustrates how to transfer, push into the dish, and patch pie dough.
- Make Pâte Sablée or Dairy-Free Pâte Sablée using one of the above-suggested or your favorite dairy-free substitute(s).
Remember, you can always access previous lessons on the Syllabus page.