
If you’ve ever been afraid to make or cover a cake with fondant, your fears are now over! You can even use this miracle gluten free fondant recipe to make characters, animals, and other fun things. You don’t have to worry about the fondant tearing, cracking, or drying out. Using your stand mixer, you can make fondant that works incredibly well!
Watch the Video: How to Transfer the Fondant to the Cake.
This recipe was adapted from Marshmallow Fondant Recipe
What Tools Will I Need to Make Fondant?
There are a ton of tools available to shape and cut fondant, but they are not needed at all. All you need are two strong hands and arms (not super-strong, just not arthritic), the ingredients, and extracts of choice for flavor along with food coloring if desired.
How Far in Advance Can I Make the Fondant?
I made the fondant one week prior to rolling it out and adding to the cake. I could have easily used it three days later. This fondant recipe is set up to make in advance. You should not use it on the first day. It’s just a little too soft. Allow it to set rest and then reheat the immediately before rolling out.
Which Brands of Fondant Are Gluten Free?
Satin Ice fondant is nut-free, dairy-free, gluten-free, vegan and kosher.
Wilton’s white fondant is made using wheat starch but is doesn’t bother many people on a gluten free diet because it so highly processed that there is no wheat left in the product. In checking Walmart’s website, the following ingredients are listed:
SUGAR, WHEAT SYRUP, PALM OIL, WATER, GLYCERIN, GUM TRAGACANTH, TAPIOCA STARCH, SODIUM CARBOXYMETHYL CELLULOSE, NATURAL AND ARTIFICIAL FLAVOR, TITANIUM DIOXIDE (COLOR), SODIUM ACETATE, ACETIC ACID.
What brands of food coloring are gluten free?
I used AmeriColor Gel Super Red Food Coloring for the fondant that I used to cover my cake. For the under-the-sea-creatures that I colored, I used this gel fondant. Always use gel food coloring to color fondant as it doesn’t add a lot of unwanted water.
Marshmallow Brand
The brand of mini marshmallows that I used was Clover Valley from Dollar General. They are sold in 10-ounce bags. So, you need to weigh out 16 ounces/1 pound.
What Type of Cake Can I Cover With This Fondant and How Do I Fill and Frost It?
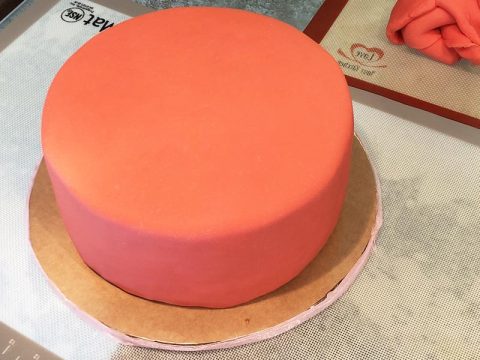
You want a fairly sturdy cake. You shouldn’t cover a fragile, light, cake. I cover my new favorite Gluten Free Chocolate Buttermilk Cake. Then I filled the four-layer cake (double recipe) with Whipped Ganache. Then, I evened out the sides by slicing off the sides of the cake as needed to make it flat all the way around. Then, I sealed it all with Chocolate Ganache Using 1 cup of cream.
Gluten Free Fondant Recipe
Ingredients
- 2 pounds confectioners’sugar
- 16 ounces mini marshmallows fresh, (Clover Valley or Jet Puffed)
- 1.25 pounds gluten free fondant (Satin Ice - also vegan)
- 1 tablespoon water (at room temperature)
- 1/2 cup vegetable shortening (Spectrum Organic)
- Extracts of choice (I use 1 tsp clear artificial vanilla + 1/4 tsp almond)
- Gluten free gel food coloring (see above for brands)
Instructions
-
Sift the confectioners' sugar into a large bowl; set aside.
-
Add the shortening to the bowl of your stand mixer fitted with the paddle attachment; set aside.
-
Microwave the marshmallows in a microwave-safe bowl for 40 seconds; remove and stir. You want to heat the marshmallows until no lumps remain. (Note that if you are making a smaller recipe, cut the microwave times in half and do not go past the point of all of them melting. I made one recipe that was 1/4 of this recipe and the marshmallows melted in just 30 seconds.) Microwave again for 30 seconds and stir. Microwave one last time for 30 seconds and stir. You want to heat the marshmallows until no lumps remain. Pour the water onto the sides of the bowl and scrape all of it into the mixing bowl with the shortening.
-
Add the 1 cup confectioners' sugar and beat until smooth, 2 minutes or more, adding in a little food coloring as you go. (Alternatively, you can divide the finished fondant in desired amounts and knead in gel food coloring as desired.)
-
Add another 1 cup of confectioners' sugar and beat until smooth, adding more food coloring as needed.
-
Microwave the Satin Ice Fondant in the microwave for 30 seconds and add it to the bowl of the remaining sugar. Add a little food coloring on top.
-
Grease your hands using shortening and remove the fondant from the paddle attachment and the bowl. Transfer the homemade fondant to the bowl of confectioners' sugar, kneading in the remaining sugar. Once the fondant won't pick up any more sugar, transfer the fondant to a silicone baking mat or other smooth, non-stick surface and knead in the remaining sugar a little at a time. Grease your hands with a little shortening if it ever sticks to your hands. Pat some sugar into the fondant and then stretch the fondant, twist, fold in half, stretch, twist, fold in half again. Do whatever it takes to get the sugar deep into the mass of fondant and thoroughly distributed. Add in additional food coloring, as needed. (I wore latex gloves.) The twisting is important as is the stretching. Continue in this fashion until all of the sugar is in the fondant. Rewarming for 15 to 30 seconds helps remoisten the fondant enabling you to pick up all of the sugar.
-
Place the fondant in a gallon zippered storage bag and then in a sealed container (or at least another zippered storage bag). Store at room temperature at least 20 hours. (I stored mine for as long as 1 week prior to using it. It can last for months, really. Just reheat it in the microwave until pliable.)
-
When you're ready to use the fondant, microwave the entire thing for 30 to 60 seconds and tear off the amount you think you'll need. (I rolled the entire amount to cover a 10-inch round, 4-1/2-inch high four-layer cake, but had leftovers.)
-
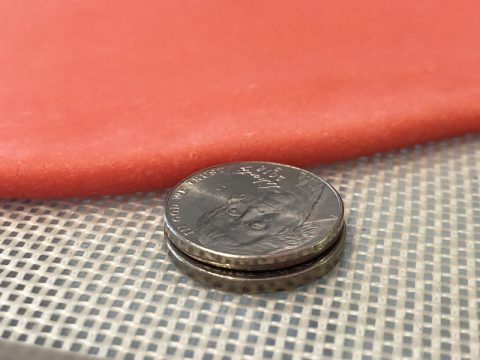
To cover a cake, roll out the fondant to your desired thickness, 1/8-inch to 4/25-inch (2 nickels thick). If you mess anything up, just reheat the fondant and reroll. You want the fondant warm enough to roll quickly. You shouldn't be struggling to roll it out. If you are, it definitely needs to be rewarmed.
-
Cover with sheets of parchment paper and using a long rolling pin, roll the fondant onto the pin.
-
Quickly move the fondant to the cake, and begin unrolling it beginning at the right side of the cake (if you're right-handeand unroll as you go over to the left side of the cake. See the video.
-
Lift up the skirt of the fondant and press the fondant up against the skirt stroking from the top to the bottom at first. Once attached to the cake, if you wish to make a sharp edge at the top, then begin to stroke from the bottom to the top. You can use your hands or a plastic fondant smoother.
-
Once the cake is covered in fondant, using a paring knife, cut along the bottom of the cake and remove any excess fondant. Be sure that you only store the leftover fondant that is clean without any frosting on it. Leftovers can be stored for months at room temperature.
-
To glue anything to your fondant-covered cake, mix a small pinch of fondant with a few drops of water to make a runny glue. Then, using a clean kitchen paintbrush, brush the glue onto whatever you wish to glue onto the cake. Be sure to make thicker glue for heavy objects. Be sure that the item doesn't slide down the side of the cake. This recently occured to me with just one fish. It's not pretty because it leaves a shiny surface behind, similar to a snail or slug trail.
-
Store your cake at room temperature up to three days. like to cover my cakes two days prior to an event.
-
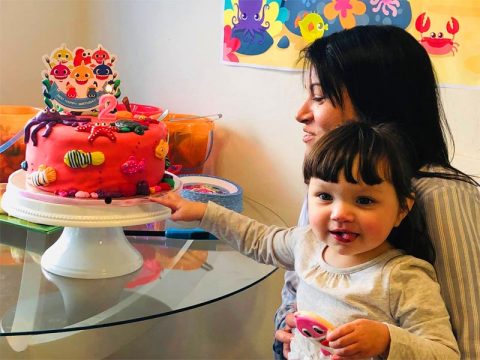
When displaying the cake, keep away from small hands that like to touch everything or you'll end up with dents in your fondant. I speak from experience.
Tips
*You will need a total of 2 tablespoons + 1-1/2 teaspoons of liquid. I suggest adding only 1 tablespoon of warm water at the beginning and then adding whatever food coloring and flavoring you desire. Be sure to measure everything as you go along. When you add a lot of food coloring, it makes the fondant way too soft to mold into shapes. Plus, it will stretch too much to put on top of the cake if it contains too much liquid. It also will depend on how long you plan on storing your fondant. If you make it 1 week in advance, the above amount of liquid is perfect. If you wish to use it right away, reduce the water by 1 tablespoon.