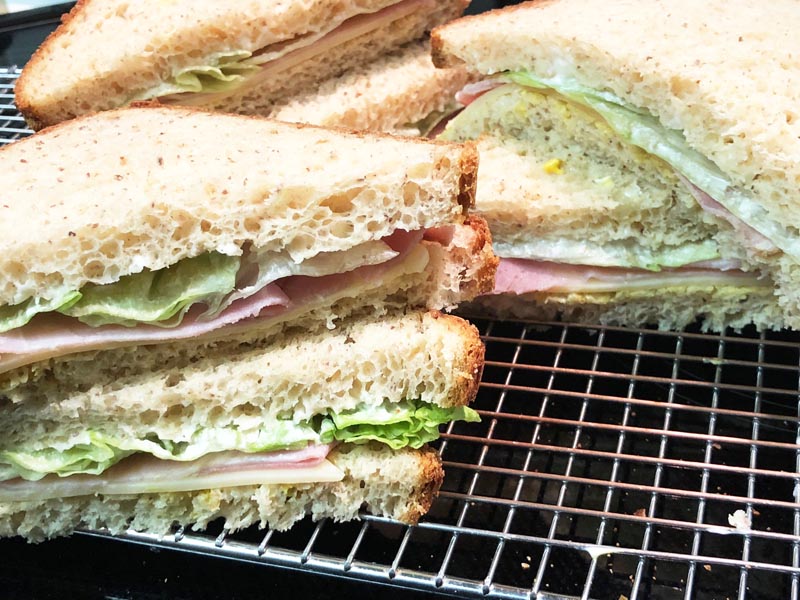
Everyone is always asking me what is my favorite gluten free bread recipe. Until today, I have always enjoyed Gluten Free Oat Bread. However, this newest recipe is over the top soft, has the perfect gluten-like texture, and tastes great! Make it in an oven or bread machine. Check out the texture in this video at Gluten Free Brown Rice & Oat Bread Video.
Sometimes Errors Create Beautiful Things
Originally, my plan was to replace 1/2 cup of oat flour with brown rice flour, using just 1 cup of oat flour. Instead, I made a mistake and only used 3/4 cup of oat flour. I don’t know what I was thinking, but as I typed up this recipe, it dawned on me why this bread turned out so light and airy. I love this bread! I’ve added a way of making it more structured in the Tips section if you’re not into airy bread.

A light, moist, soft gluten free bread made with a brown rice and oat flour base. This bread will charm even gluten bread connoisseurs.
Ingredients:
- 1 cup + 2 tablespoons water
- 1/4 cup light extra virgin olive oil (or oil of choice)
- 3 large eggs (1/2 cup), at room temperature
- 2 tablespoons honey (or agave or sugar)
- 1 teaspoon gluten-free apple cider vinegar
- 1 teaspoon sea salt
- 3/4 cup gluten-free oat flour - (or 2/3 cup sorghum flour)
- 1/2 cup brown rice flour (or 3/4 cup more oat flour)
- 1 cup + 2 tablespoons potato starch
- 1/2 cup cornstarch (or tapioca flour/starch)
- 1/4 cup flaxseed meal (golden and/or brown)*
- 1 tablespoon xanthan gum (or guar gum for corn-free)
- 1/4 cup non-fat instant dry milk (or use non-fat milk instead of water or water for dairy-free)
- 2-1/4 teaspoons instant dry yeast
- 2 teaspoons gluten-free oats for top (optional)
Instructions:
- Add the wet ingredients to the bowl of your bread maker; set aside.
- In a separate bowl, whisk together the remaining dry ingredients and add to the top of the wet ingredients.
- Using a bread machine with a gluten free setting, follow the manufacturer's instructions. For my Breadman BK1050S, I use setting number 10 for gluten free. For programmable bread machines without a gluten free setting, set the machine to the following settings: Crust: Medium; Keep Warm: 0; 1st Knead: 5 minutes; 2nd Knead: 10 minutes; 1st Rise: 40 minutes; Punch: 10 minutes; 2nd Rise: 10 minutes; Shape: 5 minutes; 3rd Rise: 35 minutes; Bake: 65 to 90 minutes (both will be fine). One or two rises work well too. Just be sure that the final rise is long and the bread is nice and high.
- In my machine, after 15 - 20 minutes of stirring, I open the machine and using a silicone spatula, I scrape any loose flour away from the sides and bottom. For non-gluten-free machines, you can do this as you see fit. Let the machine do the rest. Total time: 2 hours, 50 minutes to 3 hours, depending upon the machine.
- If desired, after the stirring has completed, remove the paddle from the machine to avoid a large hole at the bottom. Also, if desired, add oatmeal or your favorite seeds to the top of the bread. Using moistened fingers, pat the oatmeal and/or seeds into the dough using the back of your fingers.
- Once baked, remove the kneading peddle, if still in the bottom of bread. Transfer to a wire rack to cool completely, about 2 hours.
- Slice using a serrated knife, electric meat/bread slicer fitted with a serrated blade, or electric serrated knife.
- Use for sandwiches, toast, or French toast. Freeze leftover slices and thaw as needed in the microwave or at room temperature for a short period.
- Perform the steps above for 1 - 2 in the bowl of your mixer. Beat for 6 minutes using the paddle attachment. Transfer to an oiled 9 x 5-inch loaf pan; allow to rise at room temperature for 40 minutes or until 1-inch over the rim of the pan.
- Preheat the oven to 350ºF. Bake on the center shelf for 90 minutes.
- Immediately remove from the pan and cool completely on a wire rack. Slice and store as described in the above instructions.
Tips
*Golden flaxseed meal blends into the bread where you cannot see it. The brown is visible. I used both. So, you can see little specks of the ground, brown flax.
Less Airy: Type of Flaxseed Meal: If you wish the bread to be less airy and more structured, add an additional 1/4 cup rice flour (white or brown).
Using Sorghum Flour: instead of Oat Flour If using sorghum flour to replace the oat flour, add 2 additional tablespoons of oil.


I baked two loafs of this bread: one with oat flour and corn starch, one with sourgum and tapioca flours. Both came out amazing! My kids absolutely love it. It is rubbery (in a really good way), I did not fathom this consistency was achievable via non-gluten means. A couple of modifications I did:
– dairy free: I used almond milk
– took about a couple of hours and being over a warmer plate for dough to rise, but so worth it!
I absolutely love how it turned out. I do want to experiment with the future loafs by decreasing potato start and increasing oat flour. Any thought on that? Would that make it less awesome? Thank you for sharing this recipe. It’s a game changer for me!
Can I omit the flaxseed?
My medical advisor has told me to avoid it.
I am thrilled to find a good GF bread recipe without tapioca or millet flour!
Marie,
You can replace the flax seed meal with chia seeds (no need to grind). Otherwise, you can leave it out but it will have less structure. This recipe does not contain flax: https://glutenfreerecipebox.com/gluten-free-bread-recipe-without-flaxseed-machine-or-oven/ .
Carla.
I just found your conversion chart. You may disregard previous comment if you wish. I will try to follow the chart. Hope it works!
I wish all bakers would change to weighted ingredients. I can’t even try any more recipes that don’t use weight for measuring. Too many variables, and failures. Otherwise looks like good potential.
Is it possible to replace eggs somehow to make it vegan?
Rakhi,
You can make this gluten-free bread vegan. See my May 5, 2022 update on the egg substitute page: https://glutenfreerecipebox.com/gluten-free-egg-substitute/. Enjoy!
Carla
Thanks Carla. I found my mistake though. I forgot to add the cornstarch. The second loaf was wonderful. It had exactly the right chew and texture as a regular wheat loaf does, especially on the first day.
I just finished baking this. I have to check my measurements though and am going to make another loaf in a few minutes to compare, because I think mine was a bit on the wet side since it sank a bit after it rose while it was baking. However that being said, it is delicious (even if it looks a bit like an overgrown raisin)! And yes, I couldn’t wait until it was cool to taste it and had my husband slice it while it was still warm. It looks just like your picture inside! I had also made my husband a loaf of glutenous bread at the same time which he had been enjoying but when he tasted mine he said “It sure tastes a whole lot better than mine!” So it’s obviously a winner.
Linda,
Just add an additional 1/4 cup rice flour next time. The way people measure varies.
Carla