
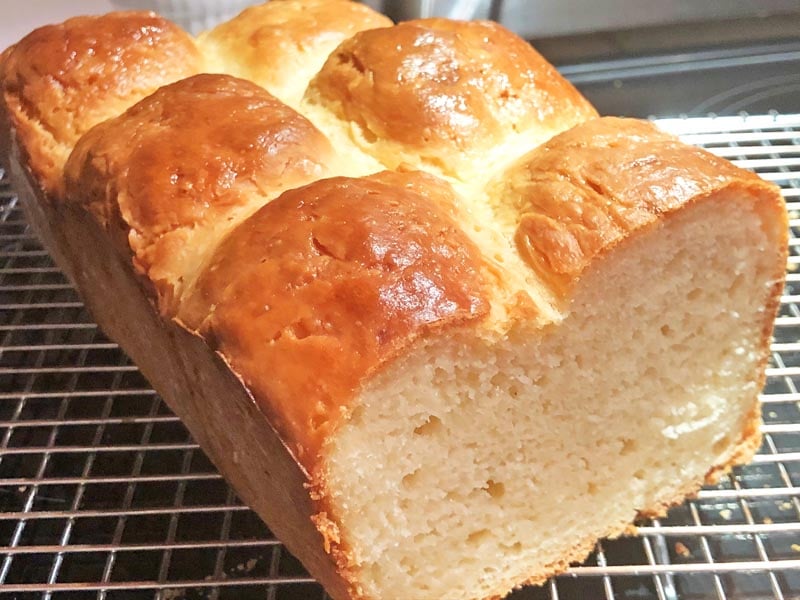
Make this gluten free milk bread for any special occasion. Its soft, flavorful, moist dough looks stunning, without the need for braiding. You’d swear it contains dairy. While you can rise this dough only two times, a third time develops more flavorful dough. This bread reminds me of a gluten loaf my husband once made in our bread machine in the mid 90’s. Mmmm.
Links You May Need:
Carla’s Gluten Free All-Purpose Flour Blend Recipe
Brod & Taylor Folding Proofer/Slow Cooker (optional)
Gluten Free Milk Bread
Ingredients
For the Dough:
- 1 cup homemade almond milk almond skin removed (see above recipe link) (or Simply Almond brand contains no gum)
- 5 cups + 1/3 cup Carla’s Gluten Free All-Purpose Flour Blend Recipe divided
- 1 cup full-fat coconut milk or heavy cream
- 1/3 cup honey
- 2 tablespoons active dry yeast
- 1 tablespoon salt
- 6 large eggs
- 6 tablespoons coconut oil melted (I used cold-pressed) (or use unsalted butter, melted)
- Oil two 9 x 5-inch loaf pans.
For the Egg Wash:
- 1 egg for basting
- 1 teaspoon water for egg wash
- 1 tablespoon dairy-free margarine melted, for basting
Instructions
-
Oil two 8 x 4-inch loaf pans; set aside.
-
Add homemade almond milk and 1/3 cup flour blend to a 1-quart saucepan. Whisk often over medium heat until thick, about 5 minutes. (If it becomes lumpy, beat with hand blender.) Remove from heat and stir in coconut milk and honey. Transfer to the bowl of your stand mixer and wait until cooled to about 90 – 110°F.
-
Add the yeast, salt, and eggs. Beat on low speed just until combined. Allow the mixture to rest for about 5 minutes and until bubbles form.
-
Add 5 cups of the flour blend one cup at a time and mix on medium speed after addition.
-
Once all of the flour is combined, add the melted coconut oil. Beat on medium speed until creamy.
-
Oil a large bowl, and transfer the soft dough to the bowl. Cover and allow the dough to rise in a warm environment until doubled in size, about 1 hour. (I use a preheated proofer, Brod & Taylor Foldable Proofer and Slow Cooker, preheated to 84°F and do not cover the bowl.) You can also allow it to rise in the refrigerator, covered for a couple of hours.
-
Punch the dough down and allow it to rise in the refrigerator, covered, for 2 hours or until doubled in size again. The refrigerator helps the dough to be slightly stiffer so you can eventually shape the dough.)
-
Heavily dust a silicone baking mat or other smooth surface with potato starch. Punch the dough down and scoop out a slightly heaping 1/2 cup of dough onto the potato starch. Place about 1 tablespoon of potato starch on top of the 1/2 cup of dough. Form into a mound. Using a bench knife/dough scraper, scoop the dough up into your potato starch-dusted hands and shape into a smooth ball. You’ll want to push and fold lines underneath the dough. Transfer to one of the prepared pans and repeat until you have 6 dough balls lined up in two lines, 3 on the left and 3 on the right in each pan. (You’ll want to place one on the left and the next to right of it because they begin to rise quickly and fill up more than half of the pan.)
-
Allow the dough to rise in a warm place about 84°F until slightly over the rim of the pan. While the dough rises, preheat the oven to 375°F.
-
Whisk together 1 egg and 1 teaspoon water and baste on top of each ball. Don’t baste into the cracks otherwise, they will turn dark brown and not show off those white cracks. (Don’t sweat it if the egg get into those cracks though.)
-
Bake on the center shelf for 25 minutes for an 8 x 4-inch pan. I Baked one in a 9 x 5 pan for 50 minutes and the inside dough was no different. The outside just had a crunchy crust. I don’t care for crunchy, so I wrapped the whole thing in foil, while still hot, to steam for about a half an hour. The crust softened perfectly.
-
Remove from the oven and immediately remove from the pan and transfer to a cooling rack. Baste the top with your favorite dairy free buttery spread. Slice immediately and serve. Alternatively, you may allow the loaf to cool entirely, slice, and freeze in a zipper storage bag. You can also freeze an entire unsliced loaf once cool. Freeze all leftovers, defrost at room temperature, and rewarm as desired such as the toaster or in the microwave on low.
The linked recipe for your all purpose GF flour blend says it is too starchy to use for breads. What blend should we use for this milk bread?
Pam,
The all purpose flour blend is too starchy to be used alone for gluten-free bread recipes. It works perfectly in smaller amounts in this recipe.
Carla
Can you provide the GF flour in grams instead?
Jennifer,
When I first started my blog, no one owned a scale, or hardly anyone did. Therefore, I omitted grams. Since then, I have been adding grams to recipes that I remake or newly add. Meanwhile, you’re welcome to use the approximate grams based on how I measure in this chart: https://glutenfreerecipebox.com/gluten-free-flour-conversion-chart/
Carla
Can you use store bought almond milk? And can you substitute coconut oil for the basting instead of dairy free margarine? I don’t use margarine of any kind.
So excited to try this! Ty!!
Suzanne,
I recommend Simply Almomd for store-bought as it does not contain gums. If you’d like to experiment, you can use almond with gum and slightly reduce the gum in the flour blend.
Coconut oil will make the bread crust harder and crisper. You can try an organic buttery spread.
Carla