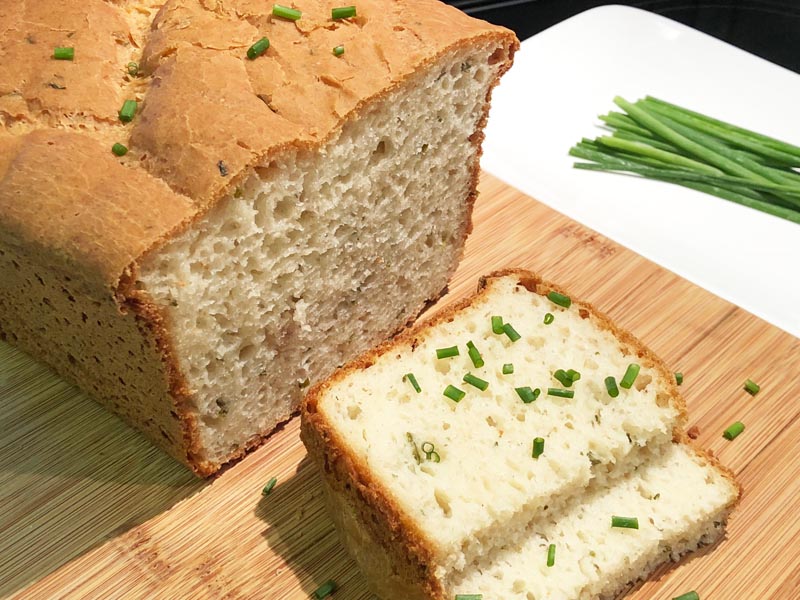
Moist, rich, creamy gluten free potato chive bread, with the texture of gluten sourdough but a little heavier, this bread will be raved about by all. It’s incredible despite being gum- and dairy-free. The perfect bread to serve with stews and gravy, to make a sandwich, or even toasted as a snack. Try cutting the bread into small pieces, placing under the broiler, and adding your favorite accouterments like garlic butter and cheese or avocado and/or chopped tomatoes.
Check out this breads’ texture in this short Video.
If you’re in the market for a bread proofer, my friends at Brod & Taylor sent me a folding proofer and slow cooker combo. I love it and have also used it to ferment homemade yogurt. It’s available on Amazon, at Williams Sonoma, King Arthur, Brod & Taylor website, Sur la Table.
Gluten Free Potato Chive Bread
There’s just nothing like gluten free potato chive bread. In between bread and a biscuit, its moist, creamy texture will be raved about by all. Learn about many of the gluten free ingredients used and how they help make this bread incredible.
Potato
Potato flakes as well as potato starch hold moisture. This moisture is obvious in this bread.
Sugar & Oil
Sugar and fat (oil and full-fat yogurt in this case) also contribute to moisture.
Psyllium Husk Powder
Psyllium husk not only holds moisture but acts much like xanthan and guar gum, all of which holds all of the ingredients together in place of gluten. However, that’s not all it does in this case. Psyllium husk tends to create a smooth surface in dough compared to gums.
Double Rise
Also contributing to a smooth surface is a double rise. Doughs that only rise once tend to break open quite a bit and in several areas at the top of the dough. With a double rise, you get less of this cracking.
Gluten Free Potato Chive Bread
Ingredients
- 2 cups white rice flour (308g)
- 1 cup cornstarch (126g)
- 1/2 cup potato starch (78g)
- 1/2 cup potato flakes (116g) (Siloh organic) (or gluten free instant potatoes)
- 2 tablespoons granulated sugar (or honey)
- 4-1/4 teaspoons psyllium husk powder
- 2-1/4 teaspoons instant yeast*
- 1-1/2 teaspoons salt
- 1-1/4 cups water heated to 110⁰F
- 3/4 cup ( Homemade Dairy-Free Yogurt Substitute ) (or full-fat yogurt)
- 1/4 cup neutral-flavored oil (extra-light tasting olive oil)
- 1 teaspoon apple cider vinegar
- 3 large eggs almost at room temperature
- 1/4 cup snipped chives**
Instructions
-
Oil a 9 x 5-inch baking pan; set aside. Add all of the dry ingredients (rice flour, cornstarch, potato starch, potato flakes, sugar, psyllium husk powder, yeast, and salt) to a bowl and whisk to combine; set aside.
-
In the bowl of your electric mixer, add the warm water, yogurt, oil, vinegar, and eggs. Beat on medium speed just until combined.
-
Add all of the dry ingredients all at once and top with the chives. Beat on medium speed for 3-1/2 minutes (based on the use of a KitchenAid mixer; if using a lower powered mixer, beat 5-1/2 minutes instead.)
-
Gather the dough-batter by scraping the sides of the bowl. Oil the top of the dough, cover with a tea towel, and allow the dough to rise for 40 minutes. Alternatively, do not oil or cover and rise in a proofer. (My friend sent me a free Brod & Taylor Proofer and Slow Cooker. See the link above.)
-
Scoop the dough into the prepared pan. Allow the dough to rise for 25 minutes or until about 1/2-inch over the rim of the pan.
-
While the dough rises, preheat the oven to 350⁰F.
-
Bake the bread on the center shelf of the oven for 15 minutes. Tent with foil and bake an additional 1 hour and 15 minutes.
-
Immediately remove from the pan and transfer to a wire rack to cool completely, about 1 hour 55 minutes. Slice and serve.
-
Freeze any leftover slices in a zipper-storage bag. Defrost in the microwave on low when ready to serve. If you don't like using a microwave, wet a paper towel and heat in the microwave. Then wrap the bread with the paper towel.
Tips
*You may use active dry yeast, but you may need to allow the dough batter to rise a little long. View photos to get an idea on how high the dough needs to rise in each stage.
**Rinse and pat dry chives. Use kitchen scissors to snip off the ends of chives into 1/8-teaspoon pieces.


OMG… this bread gets better and better each time I make it.
Love the taste and texture.