
This is another recipe from my upcoming cookbook, Carla’s Best 125 Gluten-Free Recipes. The recipe testers who made this gluten free puff pastry stated that the dough is easy to work with and is worth the effort. I use it to make both sweet and savory recipes.
Remember walking past a bakery and being tempted by all of the flaky and puffy pastries? Well, it’s no longer a thing of the past. Roll up your sleeves because puff pastry is back! While some consider it a labor of love, all of the noises that come from indulgers make the task worth it.
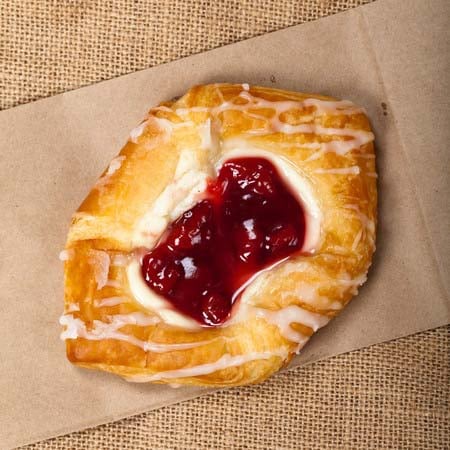
I have had many requests for a gluten free puff pastry recipe that does not take 3 days to make. This one can be made in one day and used for pastries like Danish as well as savory dishes such as beef wellington. One of my cookbook recipe testers stated, “Some things are worth waiting/working for.”
Phyllo Dough is very thin sheets of dough. Even though both recipes are actually gluten free puff pastry, it is the closest thing we can use in gluten free baking. There are differences between the two recipes. Some of the differences in this gluten free puff pastry dough recipe is that it contains butter in the dough, more flour in the butter block, less butter for the butter block, much more yeast in the dough, and the addition of eggs. Once the butter is added and folded, there are only three rolls and folds to perform. You only have to fold in half or in thirds, no fancy envelope folds. Be sure to read the Tips section and the entire recipe prior to making it. I used this gluten free puff pastry recipe in my Gluten Free Danish Recipe.
UPDATE: Watch me make half a recipe in this four-part video: How to Make Gluten Free Puff Pastry.

Use this gluten free puff pastry for all of the recipes you used to make using gluten-filled puff pastry.
Ingredients:
- 1-1/2 cups (3 sticks) cold, unsalted butter (or palm oil for dairy free)
- 3 tablespoons Carla's Gluten Free All-Purpose Flour Blend recipe
- 3-1/2 cups Carla's Gluten Free All-Purpose Flour Blend recipe
- 1/4 cup granulated sugar
- 1 teaspoon gluten free baking powder (omit for Baklava and Flaky Croissants)
- 1/2 teaspoon salt
- 4 tablespoons (1/2 stick) unsalted butter, very soft
- 2-1/2 Tablespoons instant yeast
- 6 tablespoons water, heated to 105 - 110°F
- 1 cup cold milk
- 2 large eggs, at room temperature
- Potato starch, for dusting
Instructions:
- Combine 1-1/2 cups of butter and 3 tablespoons of flour using the paddle attachment of your mixer. Beat on low speed until creamy. (Use the whisk attachment, if that is all you have and your mixer can withstand the effort.)
- Wrap in plastic and form into a rectangle, about 7 x 5-inches. Freeze for 5 minutes, turn over, freeze an additional 5 minutes, and then refrigerate until ready to use.
- While the butter block is chilling, sift together the flour blend, sugar, baking powder, and salt into the bowl of a clean mixing bowl.
- Add 4 tablespoons of butter. Using the paddle attachment, mix on low speed until the butter is evenly distributed and small pebbles form, about 2 minutes. (Again, use the whisk attachment, if needed.)
- In a cup, add yeast to warm water, stir, and allow to sit until small bubbles begin to appear, approximately 2 minutes.
- Lightly whisk together the yeast mixture, milk, and eggs. Add them to the mixing bowl. Mix on low speed just until blended, 20 - 30 seconds. (If there is a little flour stuck to the bowl, it is alright. You do not want to over mix the dough.)
- Heavily dust a silicone baking mat or sheets of plastic wrap with potato starch. Scoop the dough onto to it, shaping it into a rectangle. Wrap dough in plastic wrap and refrigerate 20 minutes. (Do not knead. It is okay if it the dough is not smooth.)
- Remove the butter block from the refrigerator and unwrap. Heavily dust a rolling pin and silicone baking mat (or sheets of plastic wrap) with potato starch. Dust the butter with potato starch. Using the rolling pin, pound the butter, keeping its rectangular shape. Roll it out to a 9 x 9-inch square. Place the butter on a sheet of plastic wrap and refrigerate until firm, 10 - 15 minutes.
- Remove the dough from the refrigerator, remove the plastic wrap, and place a glass of water nearby for sealing any cracks. Heavily dust a silicone baking mat or sheets of plastic wrap with potato starch and transfer the dough to the rolling surface.
- Roll No. 1: Dust the dough with potato starch and roll out to 20 x 10-inches, dusting with potato starch as needed. Dip your fingers in the water and dab onto any cracks in the dough, around the edges, or elsewhere. (Do so throughout the recipe.) Place the chilled butter 1/2-inch from the edges of one-half of the dough. Using a pastry brush, dust away any excess potato starch. Fold the dough in half, over the butter, and pinch the edges closed with cold water. Dust the entire block with potato starch. Refrigerate for 20 minutes. At any time that the dough becomes cracked or dry, baste with cold water. (Keeping ice in the glass helps.) Just be sure to dust heavily with potato starch afterwards.
- Roll No. 2: Roll the dough out to a 22 to 24-inch rectangle. While attempting to roll it out length-wise, it will become wider than 10 inches, but this is okay. Fold it into thirds, towards the center. Pinch the edges closed with cold water, dust the entire block with potato starch, and cover with plastic wrap. Refrigerate for 20 minutes.
- Roll No. 3: Repeat step 11. Be sure to pinch the edges closed with cold water and dust the outside of the dough.
- Roll No. 4: By now the width is very wide. Instead of rolling it in the same direction as you have been, turn the dough sideways, and roll it out in a different direction, repeating step number 11.
- Wrap the dough tightly in plastic wrap. Store in a resealable storage bag or 9 x 13-inch baking dish covered with plastic wrap or a lid. Using the dough immediately is recommended. However, you can refrigerate it for up to 1 day or freeze up to 2 weeks. Defrost in your refrigerator overnight prior to using. Then leave it at room temperature, 5 - 10 minutes or until it is soft enough to pound with a rolling pin and roll. Roll as instructed in your recipe.
- After rolling out the dough, trim the edges so that the dough is uniformly shaped. In addition, the edges tend to be without butter; therefore it is preferable to remove them. Use this pastry dough in recipes such as Danish, croissants, or savory dishes. Commercial, pre-rolled puffed pastry is about 1/8-inch thick. Use this as a guide when substituting this dough for traditional puff pastry.
Tips
When rolling the dough out to make your recipe, be sure to use plenty of cornstarch or potato starch. Cornstarch makes things crisper than potato starch. Therefore, judge which one to use depending upon your desired effect.
Using a marble rolling pin helps keep the dough chilled and prevents it from softening quickly. You’ll need a heavy rolling pin no matter which type you use.
Prior to folding the dough, dust away any excess starch using a basting brush. Otherwise, the dough will not stick together well.
It is helpful to use the silicon mat or plastic wrap to help you fold over the dough. Also use the mat or plastic wrap to transfer the dough to the refrigerator. You can place it on a baking sheet and then refrigerate.
You will notice each time you roll out the dough, it becomes smoother and less puffy.
Refrigeration dries out dough. Freezing and defrosting at room temperature is best if you need to store it. However, refrigeration is sometimes necessary. If your dough dries out too much, pat it lightly with water and dust with potato starch prior to rolling.
Just made this recipe for the 3rd time. It is amazing! I used it as a topping for Chicken Pot Pie and made Chocolate Croissants with the leftover dough. It is buttery and flaky, just like regular gluten pastry dough. It is also very forgiving as my folding and rolling technique is very weak yet the dough came out perfectly. Thank you Carla!