
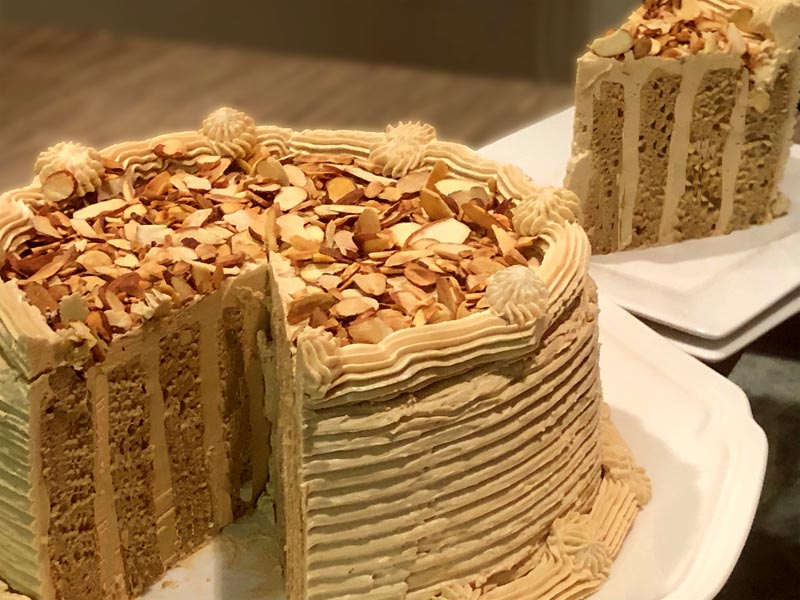
I am just so excited about this cake! Prior to my retirement, I have several bucket list recipes to develop. This one I did, just for the challenging aspect alone. It’s not only a unique and stunning presentation but the cake and frosting are incredibly delicious. Though the cake is completely dairy free, (you may use dairy if you wish), it is rich and moist, which is unusual for a sponge cake. I won’t make sponge cake any other way from here on out. In addition, the recipe for the frosting, my favorite, Italian buttercream, is laid out to address anything that goes wrong (too thin or looks curdled). This is the perfect recipe to use for a roll cake or vertical layer cake.
Links You May Need:
Carla’s Gluten Free All-Purpose Flour Blend Recipe
Wilton Open Star Piping Tip 4B
Cake Decorating Frosting Scraper-Smoother Set – Only About $1
Video: How to Add Butter to Italian Buttercream Recipe
Gluten Free Vertical Layer Cake in Coffee or another Flavor
Ingredients
- 1 tablespoon gluten free instant coffee
- 1 tablespoon rum or gluten free vodka
- Oil or gluten free cooking spray for pan
- 3/4 cup + 2 tablespoons Carla’s All-Purpose Flour Blend see above recipe link (7/8 cup or 130 g)
- 1/2 teaspoon gluten free baking powder Rumford
- 1/2 teaspoon salt
- 3/4 cup full-fat coconut milk heated until hot, but not boiling (or heavy whipping cream)
- 7 large eggs separated
- 3 large egg yolks save the egg whites for the buttercream
- 1 teaspoon pure vanilla extract
- 1 teaspoon cream of tartar if necessary, use 1/2 teaspoon distilled white vinegar
- 3/4 cup granulated sugar (150 grams)
- 1 recipe Italian Buttercream or double as desired
- 1 tablespoon gluten free instant coffee Nescafe Dark Roast (1-1/2 to 3-1/2 teaspoons)
- 1/2 cup sliced almonds (optional) (Kirkland)
Instructions
To Make the Sponge Cake:
-
When you’re ready to bake the cake, preheat the oven to 400°F. Oil a 12 x 17-inch baking sheet and line with parchment paper on all sides as well as the bottom. Oil the top of the paper, too; set aside.
-
To a small bowl, whisk together the flour blend, baking powder, and salt.
-
Add the hot coconut milk to a large mixing bowl. (Don’t use your only stand mixing bowl. You’ll need that to whip the egg whites.)
-
Whisk in the dry ingredient mixture until moist. Whisk in the egg yolks, and coffee-rum mixture until smooth. (I used my Cuisinart handheld immersion blender fitted with its whisk attachment.)
-
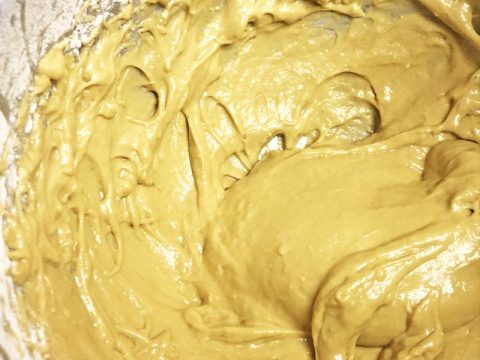
Beat in the sugar all at once until the sugar breaks down, about 2 minutes.
-
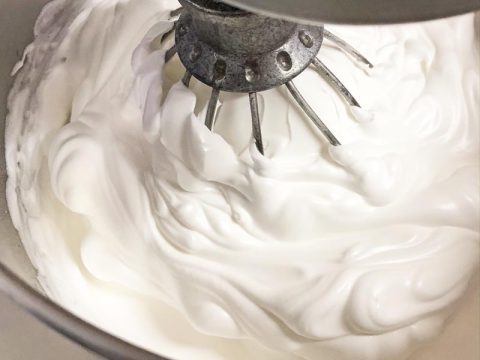
In the bowl of your stand mixer or handheld mixer fitted with the whisk attachment, beat the egg whites until foamy on medium speed, about 1 minute. Add the cream of tartar and beat on high speed until stiff but moist peaks form. (It should look like foamy shaving cream and when you lift the whisk, you should see a stiff curled peak.)
-
Fold the egg whites in 5 separate portions into the cake batter until no white streaks remain before adding another 1/5 of the egg whites.
-
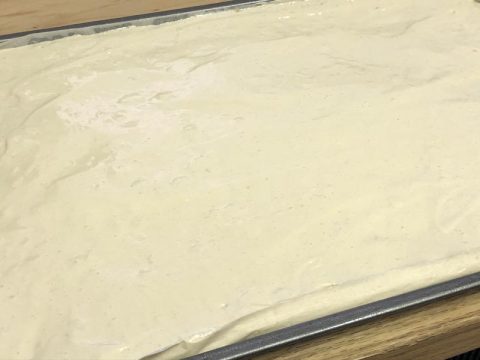
Transfer the batter to the prepared baking pan and smooth out the top.
-
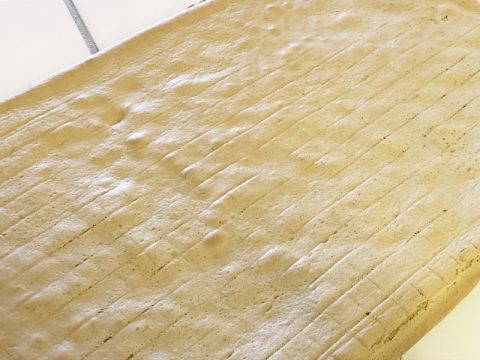
Bake on the center shelf for 15 minutes or until the center of the cake does not leave an indention when lightly touched. (You can use a spatula to do this if you prefer not to use your fingers. Just be sure to press lightly.)
-
Remove the cake from the oven and transfer to a wire rack for 5 minutes. Oil two wire racks (or one wire rack and a cold baking sheet) and place one of the two wire racks or baking sheet over the cake. Invert and remove the parchment paper. Lay the other oiled wire rack on top and re-invert so that the top is upright.
-
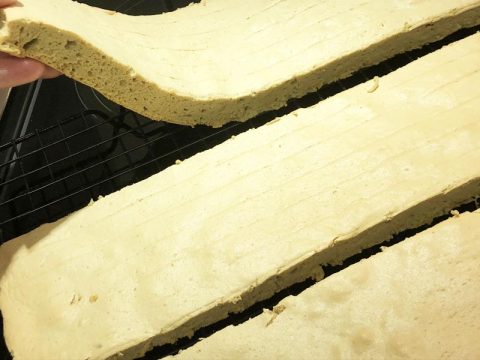
Allow the cake to cool completely, 15 to 30 minutes. Using kitchen scissors or a serrated knife on top of cutting board, trim 1/16-inch off of all four sides of the cake.
-
Slice the cake in three equal strips. Your cake will shrink to about 10 inches. So, each strip should be about 3-1/3-inch wide and 16 inches long.
-
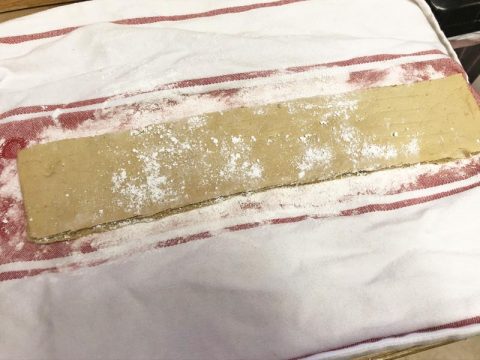
Lay out a tea towel and sprinkle with confectioners’ sugar. Lay one of the strips on top and sprinkle a little confectioners’ sugar on top and smooth out.
-
Loosely roll the cake before it dries out on the outside; set aside. You can leave the other two strips out. It won’t dry out.

To Make the Italian Buttercream:
-
First, decide how much buttercream you’ll need. Do you want a thick layer of frosting in the sponge cake as well as the outside of the cake? Do you also want to pipe a fancy edge on top and/or bottom edge? Definitely double the recipe for the buttercream. If you just want a thin frosting layer on the inside and just enough to create an even layer on the outside, without any piping or decorations, one recipe is sufficient.
-
Make the buttercream as instructed at the above recipe link with the following difference: When adding the sugar and water to the saucepan, add 2-1/2 to 4 teaspoons instant coffee. I made one batch with 4 teaspoons and while it tasted amazing, it was too much caffeine for me. I made the next batch using 2 teaspoons and it had a good flavor but could have been a tad stronger. See the added Tips section for easy fixes for troubleshooting problems.
To Roast the Almonds:
-
Add the sliced almonds to a heavy 12-inch skillet over medium-high heat. In the beginning, you won’t have to stir or toss the almonds often, but as the skillet heats up, towards the end (after about 5 minutes), you’ll need to stir about every 15 seconds. It’s best to over stir than burn them. The thinner and lighter the weight of the skillet, the shorten the time and more likely to burn. Set aside to cool.
To Assemble and Decorate the Cake:
-
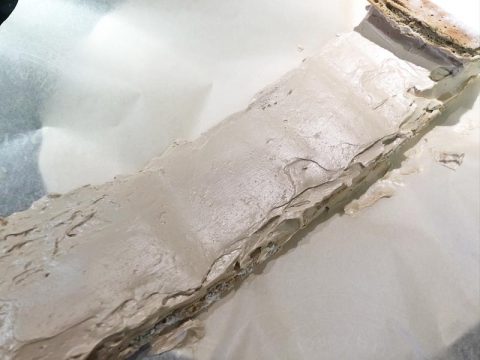
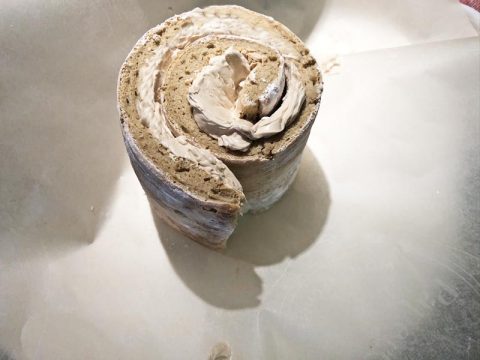
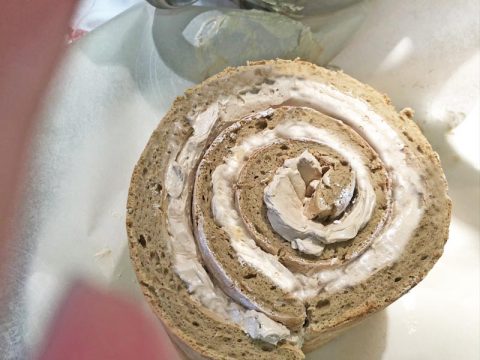
Unroll the rolled cake strip and you’ll see that it has a lip on one end. Begin filling the lip with buttercream and down the strip. Even it out and more where you see it is missing some. The more time you spend evening out the buttercream, the prettier and more even your layers will appear when you slice the cake.
-
Roll the cake strip up so it looks like a cinnamon roll and place on a sheet of parchment paper. (I used a precut 9-inch circle sheet.)
-
Evenly frost the other two layers.
-
Add a tiny bit of frosting to the end of the strip that is rolled. Attach one of the unrolled strips and wrap it around the rolled strip.
-
Repeat with the remaining strip.

-
Add a thin layer of buttercream (called a crunb coat) on the top and sides. Refrigerate until set, about 20 minutes.

-
Remove from the refrigerator and add a nice thick layer of frosting or whatever it takes to even out the top and sides of the cake. Refrigerate and repeat as necessary.
-
To decorate as in the photo. Use a fine zig-zag edged frosting scraper all around the sides. Using a fine star tip (Wilton 4B) pipe out buttercream along the top edge, and bottom too, if desired. Using the same tip, you can pipe out a fine star of buttercream intermittently. Note: if you have a cake decorating turntable, you should be able to pipe out a continuous edge on the top of the cake, while the turntable turns on its own. However, it doesn’t work for the bottom edge. In that case, stop every two to three inches and indent. Then, go back and in that indention, pipe out a fine star. Add the cooled, roasted almonds to the top of the cake and lightly press into the buttercream.
-
Refrigerate the cake for 2 to 3 days. Sponge cakes usually require a good 24 hours before they are moist enough to serve. However, this sponge is moist due to the coconut milk (or cream) and may be sliced and served as soon as the buttercream is set, 20 to 30 minutes. (Note: There will be some slices with only 3 layers as the third strip doesn't completely go around the entire cake.) Serve the cake at room temperature. The sponge appears to be dry when served chilled.
Tips
Variations:
Coffee Whipped Cream: Instead of coffee buttercream, add instant coffee to heavy whipping cream when making homemade sweetened whipped cream.
Strawberry: You can use some ground dehydrated strawberries to replace some of the flour mixture to make a strawberry version. Then, instead of buttercream, make the Strawberry Whipped Cream Recipe.
Lemon with Blueberry or Raspberry Buttercream or Whipped Cream: Replace the coffee-rum mixture with 2 teaspoons pure lemon extract and the zest of 1 lemon. Then, make a contrasting buttercream like raspberry. Just add some blueberry or raspberry puree to either buttercream or adapt the strawberry whipped cream recipe to raspberry or blueberry.
Vanilla: Replace the coffee-rum mixture with 2 teaspoons additional vanilla extract. Frost as desired.
Egg-Free:
Replace each egg yolk with 1 tablespoon refined coconut oil or hydrogenated palm oil, and each egg white with 2 tablespoons liquid from a can of cannellini beans.
Thank you for this recipe and your offer to post photos of each of the steps of the vertical layer cake. I would so appreciate having the photos, being a visual learner.
Thank you so much for the public web site and for sharing your knowledge and experience! <3
Hi Q,
I have quite a few photos of the steps and each one needs to be edited prior to publishing (resize, make brighter, etc.) so that you can get a good picture of how to make this recipe. I will work on it slowly. Check back frequently. I’ve already begun.
Stay healthy!
Carla