
Where do I begin? This gluten free oreos style cookies recipe was definitely a challenge to develop. However, it was absolutely worth the time! Through trial and error of different amounts of ingredients, omitting ingredients, trying several baking times and temperatures, and different styles of chilling the dough, it resulted in great cookie. In the tips section below I provide different baking times and different dough thicknesses so that you may bake them to your preference. I hope you, your friends, and family enjoy these, as much as my husband and I have enjoyed testing all of the different varieties. It’s great to know you that you we can have gluten free oreos, and without any artificial ingredients!

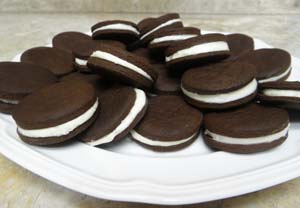
A gluten free oreos style cookie recipe baked to the correct tenderness and filled with a creamy frosting you'd be proud to serve gluten eating friends.
Ingredients:
- 3 Tablespoons organic palm shortening (or shortening of your choosing)
- 3 Tablespoons grape seed oil (or cooking oil of your choosing)
- 1 cup evaporated cane juice (or granulated sugar)
- 4 Tablespoons (1/2 stick) unsalted butter
- 1 cup gluten free dutch processed cocoa powder + more for dusting
- 3/8 teaspoon fine sea salt
- 2 large egg yolks, at room temperature
- 1/4 cup water
- 2 Tablespoons iced water
- 1/2 teaspoon pure vanilla extract
- 1 1/2 cups + 1 Tablespoon Carla’s Gluten-Free All-Purpose Flour Blend Recipe (I used cornstarch instead of tapioca)
- 1/4 cup superfine white and/or brown rice flour
- 1 stick (1/2 cup) unsalted butter, at room temperature
- 1/2 cup shortening (I used organic palm shortening)
- 1 1/2 cups + 2 Tablespoons powdered sugar
- 1 teaspoon pure vanilla extract (optional)
Instructions:
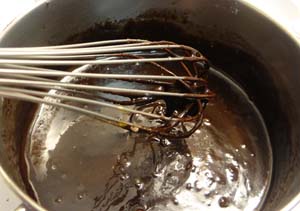
- In a 2-quart sauce pan, over medium heat, add oil, shortening, and butter; cook until all is melted and combined; remove from heat; add sugar, cocoa powder, and salt; whisk together well; return to burner; add egg yolks; whisk well; add 1/4 cup water; whisk well; cook and whisk often until you no longer see sugar granules during whisking, about 3 - 5 minutes.
- Remove from heat; add 2 tablespoons cold water; mix well; freeze batter to chill for about 30 minutes. Batter will be very thick.
- While batter is chilling, whisk together flour blend and superfine rice flour; set aside.
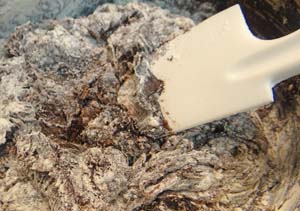
- Once batter is chilled, if using, whisk in vanilla; add 1 cup flour mixture; mix together with a firm spatula or wooden spoon; add 1/4 cup at a time and mix in thoroughly prior to adding next 1/4 cup.
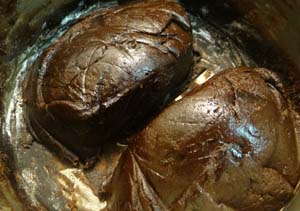
- Divide dough into 2 pieces leaving in pan; refrigerate for at least 1 hour or until firm, or up to several days, wrapped in plastic wrap.
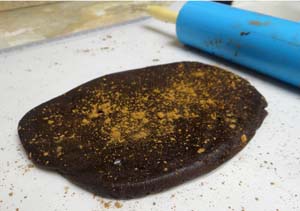
- Transfer dough to a large piece of parchment paper; lightly dust smooth (plastic, glass or porcelain) rolling pin with cocoa powder, or sprinkle some on top of the dough.
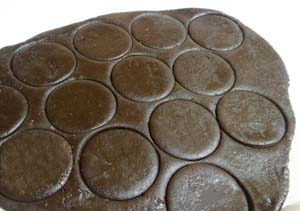
- Roll out dough to 1/8-inch thick; make cuts cookie cutter of choice (I used a 2-inch round).
- Freeze dough for 10 minutes.
- Preheat oven to 325°F.
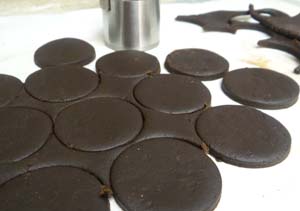
- Remove scraps from around cut out cookie dough; add scraps to the refrigerated dough.
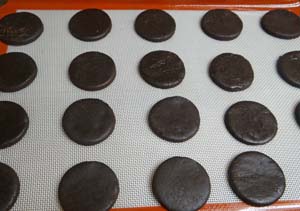
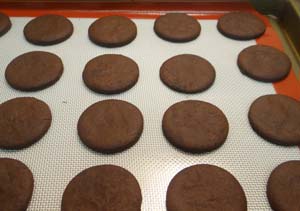
- Transfer cookies to a baking sheet lined with parchment or a silicone baking mat.
- Lower oven temperature to 300°F; bake for 20 - 25 minutes, depending how firm you desire your cookies. The dough should fill 3 half baking sheets (12 x 17-inch).
- Immediately transfer cookies to a cooling rack to cool completely. When first cooled they will be very crisp. They will soften shortly thereafter. They will also darken in color.
- Repeat process with refrigerated dough; reroll scraps a number of times until all is used up. (They won't look the prettiest after a number of times, but will taste the same.)
- Once cooled fill with filling below using a butter knife and sandwich closed with bottoms together.
- Store any leftovers in the freezer. To defrost allow to sit at room temperature.
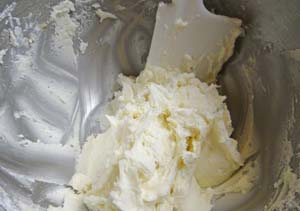
- In the bowl of your mixer, add butter and shortening; beat on high (KitchenAid No. 10) until light and fluffy; add powdered sugar and vanilla; mix beginning on low and increase speed to medium-high; beat until well combined. Refrigerate until ready to use. Bring to near room temperature before using.
Tips
If refrigerating for longer than 1 hour, wrap in plastic wrap.
The brand of dutch processed cocoa powder I usually use is Rodelle which is not organic (that I know of). If you cannot find an organic brand and wish to use something similar, Dagoba brand of organic cocoa powder suggests adding 1/8 teaspoon baking soda to every 3 tablespoons of their cacao powder. I haven't tried this, though.
Some of you may have read elsewhere that you can use powdered sugar to dust cookie dough. If you use it as it will make the cookies crisper.
For those who are egg intolerant, note that the egg yolks in this recipe are used for both moisture and as a binder. If you exclude them try replacing them with a little bit more xanthan or guar gum (1/4 teaspoon?) and 1 1/2 tablespoons of butter.
Chilling the batter: Note that times will vary as freezer temperatures vary. Even individual freezers vary in temperature depending up contents.
Trader Joe's carries an organic powdered sugar made from evaporated cane juice and tapioca starch vs. cornstarch.
For a softer cookie inside roll out to 1/4-inch thick and bake for 15 minutes at 350°F. For a crispier cookie roll out to 1/8-inch thick and bake for 25 minutes at 320°F.
Do not refrigerate dough once you cut the cookies out. This will prevent them from rising and expanding.
Do not pipe the filling, as it is very thick. Do not thin batter. As it reaches room temperature it will thin.
Hi Carla,
I am making them right now, but I am confused about the comment you have : “Do not refrigerate dough immediately before baking cookies. This will prevent them from rising and expanding….”
I thought the recipe says to put it in the fridge and then take out and bake…
Hi Fada,
What I meant by not refrigerating the dough immediately before baking, is to not refrigerate the dough after cutting the cookies out. I have reworded this to clarify it. I hope this helps and you enjoy this recipe.
Carla
I went fully sugar free with this. Using powdered xylitol and liquid stevia for the filling. Also used palm sugar and stevia in the raw for the dough. Absolutely perfect!
hey Carla!
when trying to add the oreo recipe to my ziplist, i added a cole slaw recipe. i’d love to link this up – it looks incredible!
Hi Jenn,
Thanks for letting me know. I had problems with this recipe, but thought it was all fixed now. You may have tried it adding it prior to me fixing it. The noted on your comment is near the time I fixed it. If you are still having problems, first try clearing your cache. If you do not know how to do this, here is a link which explains how to do so in several different browsers: http://clearyourcache.com/. If you continue to have trouble please let me know and I will add the recipe all over again.
Carla
I can’t pull up the oreo cookie recipe, when I click on it it brings up a cole slaw recipe? Any suggestions? I have tried pulling it up through different routes but always get cole slaw!
i wasn’t able to pull up the bisquick recipe. it showed the picture, but not the recipe. Can you help me out?
I want to try the pumpernick bread recipe. I believe the cheese crackers, I need to use millet flour instead of the rice flour.
Oreo cookie recipe, I will make for a cookie when I need something chocolate. I don’t do chocolate.
Thank you for the recipes!
Bev
Bev,
From your other comment, I see that you found the bisquick recipe. Sorry about that. In my newsletter, there are always two to three ways to get to a recipe. In today’s newsletter, there are two. You can click on the photo (however I linked to the image in error on the bisquick recipe), or click on the underlined title. (Just so you know next time.) I’m just glad you were able to find it.
You are very welcome for the recipes.
Enjoy!
Carla