
I already have a delicious Gluten-Free Dairy-Free Chocolate Cake Recipe that is excellent, but I really wanted to make a dairy version for my granddaughter’s birthday party. This new, gluten free buttermilk chocolate cake recipe is moist, delicious, tender, yet sturdy enough to withstand fondant.
How Large Is This Cake?
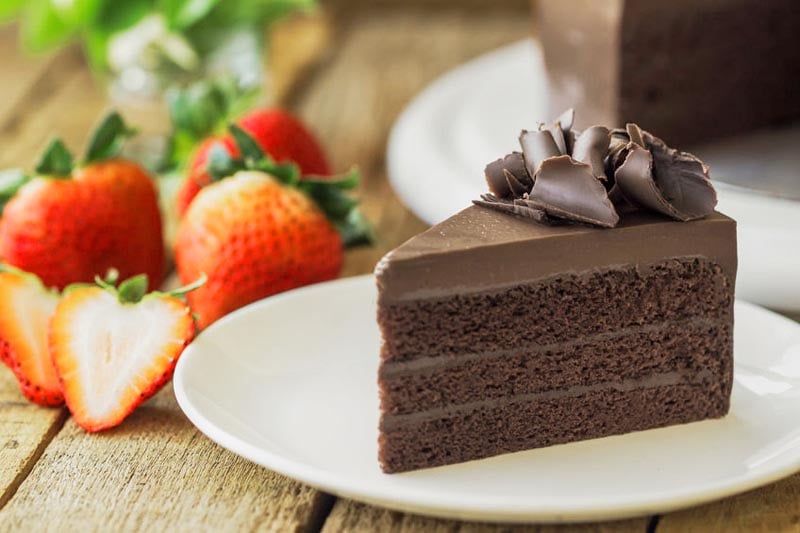
Each layer is 1-3/4-inches high. So, you can either make it a two or four-layer cake.
UPDATE: To make this cake three layers, divide equally between three pans and bake for 20 – 22 minutes or until it springs back when lightly touched.
Links You’ll Need:
Carla’s Gluten Free All-Purpose Flour Blend
How to Wrap Pans To Create Level and Light-Colored Cakes
Watch the Video: How to Make This Gluten Free Chocolate Cake.
Gluten Free Buttermilk Chocolate Cake
Ingredients
- 1-1/2 cups granulated sugar 258 g
- 1 cup sour cream 236 ml
- 1/2 cup neutral-flavored oil 118 ml
- 3 large eggs (or 6 tablespoons liquid from a can of cannellini beans + 3 tablespoons butter)
- 2 cups Carla's Gluten Free All-Purpose Flour Blend 268 g
- 3/4 cup Dutch-processed cocoa powder 68 g (or unsweetened cocoa powder like Hershey's)
- 2 teaspoons baking powder
- 1 teaspoon baking soda
- 1/2 teaspoon salt
- 1 cup buttermilk 296 ml
- 1 tablespoon pure vanilla extract
Instructions
-
Oil two 10-inch round and at least 4-inch high springform pans* with oil. If you only have one pan, make half the recipe at a time. Line the bottom with parchment paper and oil the top of the paper. Dust the sides of the pan with a mixture of flour and cocoa powder, about a teaspoon or two of each. Tap the pan on the sides and bottom to distribute the dry mixture evenly; set aside. Preheat the oven to 350°F.
-
In the bowl of your electric mixer, fitted with the paddle attachment, cream together the sugar, oil, sour cream, and oil on medium-low speed for 5 minutes or until the sugar breaks down.
-
Add the eggs one at a time, beating on medium-low until thoroughly combined before adding the next.
-
In a separate bowl sift together the dry ingredients: flour blend, cocoa powder, baking powder, baking soda, and salt. (Sifting is mandatory.)
-
Add a third of the flour mixture at a time, alternating with half of the buttermilk, starting and ending with flour, beating on medium-low speed after each addition, just until combined. Then, add the vanilla and beat on low to combine.
-
Distribute the batter between the two pans. Bake 30 - 40 minutes (20 22 minutes for three layers) or until the cake bounces back when lightly touched. The first thing to test for is if the batter does not jiggle. Once it stops jiggling when lightly shaken, then lightly touch it. If it appears to be pretty firm but doesn’t spring back, it may need 2 more minutes, but 5 minutes may be too much. It is done when it springs back.
-
Remove from the oven and cool on a wire rack for 10 minutes or until the cake pulls away from the sides. Remove the ring and allow to cool for about 15 minutes. Invert on a wire rack or plate that has been oiled. Remove the parchment paper and place back on original wire rack to cool completely, about 90 minutes.
-
Each layer will be about 1-3/4-inches high. Wrap each layer in plastic wrap and refrigerate until cold and firm. ( refrigeration makes frosting easier so that the crumbs do not fall off the cake easily. If you need the cake immediately, you can still frost it.“
-
To Make the Ganache:
-
Make the ganache at the above link using 1 cup heavy cream. Use dark or semi-sweet chocolate.
-
Allow the ganache to cool and thicken for about 1 hour prior to piping on your cake.
-
If desired, you can then whip it with your electric mixer until it looks like milk chocolate for a lighter texture. It also beats air into the ganache, which make mor frosting.
-
Piping the ganache on top of the cake in a spiral pattern creates a thick layer of ganache, which you can then spread out using an off-set spatula while applying light pressure. For a smooth finish, wipe the spatula clean on occasion using a damp cloth or paper towels. Then, dip your spatula in water before spreading out the ganache more.
Tips
*For Cupcakes: Half of the recipe makes 24 mini cupcakes and five standard cupcakes. Bake large cupcakes about 19 minutes and mini cupcakes 13 minutes or until this bring back one lightly touched.
To make this cake three layers, divide equally between three pans and bake for 20 - 22 minutes or until it springs back when lightly touched.