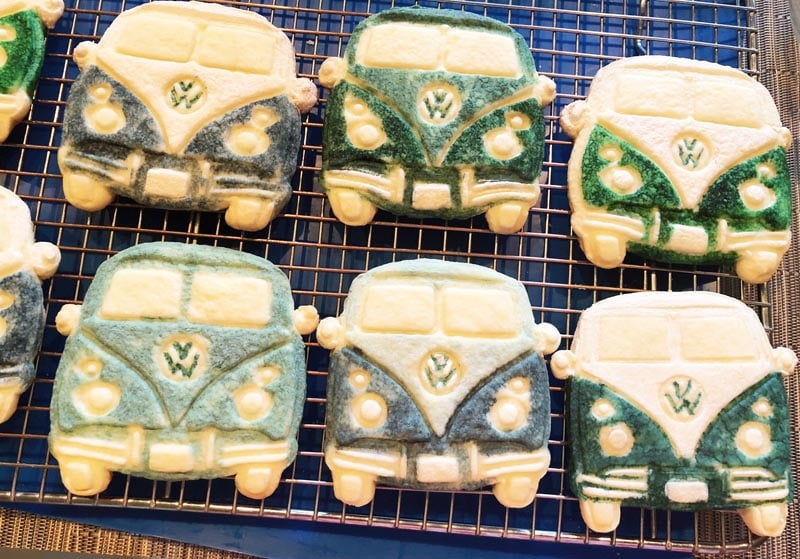
Using a single Cookie Cutter & Stamp Set, you can make these fun and delicious gluten free stamped cookies. Use your favorite gluten-free sugar cookie recipe or my Gluten Free Moist Cut-Out Cookie Recipe. These cookies are more moist and tender than traditional gluten-filled sugar cookies.
Also, see the below tips for a great dairy-free substitute.
You can paint them better than you see in the photo if you have smaller brushes. I only had one size on hand. (Used my others for painting projects.)
I suggest making a double batch of cookies. This way if you underbake some, which causes them to break easily, you’ll have extras.
This recipe is available to everyone.

Make delicious, buttery cookies by using these easy to follow instructions for Gluten Free Stamped Cookies. Also, learn how to paint them. Video included!
Ingredients:
- 1 recipe Gluten Free Cut-Out Cookies
- 1 Cookie Stamp
- Small paint brushes designated for kitchen use
- Gluten free food color (McCormick, AmeriColor, or Seelect Tea for natural)
Instructions:
- Make the cookie dough in the above-linked recipe; separate into two pieces, wrap in plastic wrap, and chill for about 1 hour.
- On a lightly-dusted floured silicone baking mat or sheet of parchment paper, roll out the dough to a thickness between 1/8 and 1/4-inch. Pound out the dough if it is quite stiff. Then, roll once it softens. Touch the dough as least as possible. Because skin contact softens the dough.
- Using the cookie cutter portion of the stamp set, cut out the dough, leaving the cutter in place. Then, place the stamp inside the cookie cutter and push down so that the stamp is just slightly lower than the rim of the cookie cutter. Then, remove the cookie cutter by lifting opposite corners; set aside. Then lifting up one of the corners of the stamp using a knife. Leave the stamped cookie in place and repeat these steps until there is not enough dough left to stamp. Chill the dough for at least 20 minutes, preferably 1 hour.
- Remove the cookie scraps and roll into a ball; refrigerate to make additional cookies.
- Preheat the oven to 350ºF.
- Remove the cookies from the refrigerator and using a paring knife, trim any excess dough from around the cut cookie dough.
- Transfer the cookies that are on a baking mat or parchment to a baking sheet. Bake the cookies on the center shelf for 10 - 12 minutes, depending upon thickness. (If you've rolled them too thickly, it may take longer and less for thinner cookies.) They should be golden brown around the edges. No golden color indicates underbaked cookies, which will break easily.
- Remove the baking sheet(s) from the oven and allow to cool on the baking sheet for 10 minutes. Transfer the cookies directly to a wire rack to cool completely. Repeat the above and this step until all dough is used up. Otherwise, freeze the dough for future use and defrost at room temperature when ready to bake.
- Once the cookies are all cool. Combine 30 drops of clear gluten free alcohol (vodka, rum, etc. I used rum as it is grain-free) with 3 drops of food coloring. Stir using your brush and paint the desired portions of the cookies. It's easiest to paint using one color at a time. Then rinse out your brush(es) and containers, dry with paper towels, and move onto a new color. Add an additional drop of alcohol as needed. The alcohol tends to evaporate fairly quickly. This is why I suggest starting with small amounts of color. I use tiny prep bowls to mix them. Allow the cookies to dry. Store them in plastic zipper storage bags or freezer bags if making in advance.

