
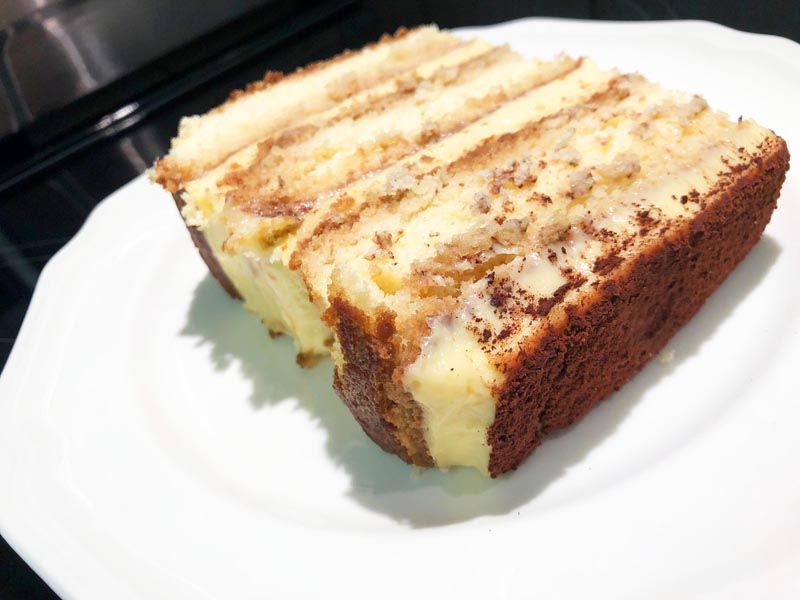
With its impressive height and three layers, this gluten free tiramisu cake has a luscious custard-like filling with a little cheesecake flavor. It doesn’t stop there. The homemade (or commercially purchased) chocolate liqueur and coffee basted cake layers are all smothered in the filling. The bold flavors never end. Perfect for making up to four days in advance without freezing.
Not a Custard Lover?
Also, check out the Whipped Cream Filled Gluten Free Tiramisu Cake Recipe. You’ll find that this recipe is a bit different than the below recipe. Chocolate liqueur is combined with whipped cream and chopped chocolate. Another difference is that only expresso is basted onto the cake layers and less of it.
Read “Is Espresso Gluten Free?”
If you are gluten intolerant, definitely read, Is Espresso Gluten Free? Then, instead of using instant espresso powder to make espresso, use the link in the recipe to make strong coffee.
Make in Advance a Little at a Time:
I start making this cake four to eight days in advance. There is a lot to it, but breaking the steps up makes everything so easy! I make the pastry cream about two days before I assemble the whole cake. Then, I allow the cake to rest after assembled about 2 days. You don’t want to make the pastry cream too far in advance. After all, it contains dairy. Once assembled, the cake can stay refrigerated up to four days prior to serving. However, you’ll want to freeze any leftover slices immediately.
After two days of resting in the refrigerate, this cake was good. However, after the fourth day, it is incredibly moist! I liked even better.
What is in Gelatin?
This recipe calls for unflavored gelatin. The Kraft website once explained that more about Knox Gelatin,
- All gelatins are created by refining animal collagen; the process is so extensive, that the resulting gelatin is entirely free of animal products.
- Nutrition Information:
Gelatin is not nutritionally well rounded enough to be a single protein source, but it does contain as many as 18 beneficial amino acids.
Gluten Free Tiramisu Cake
Ingredients
- 1 recipe Homemade Chocolate Liqueur
- 1 teaspoon gluten free cocoa powder optional
- 2x recipe Gluten Free Sponge Cake
- 2x recipe Pastry Cream (using gelatin or agar agar) You only need 3/4 of it, 4-1/2 cups.
- 1 recipe Gluten Free Espresso
- 1 (8-ounce) package gluten free cream cheese, (Philadelphia) + 2 tablespoons heavy cream (or milk or 8 ounces mascarpone cheese)
- 1 teaspoon gluten free cocoa powder for dusting
Instructions
-
Make the chocolate liqueur; set aside for 3 days, shaking once or twice a day. There is no need to ever strain the liqueur for this recipe. If desired, add a teaspoon of cocoa powder as well for a richer, chocolatey flavor.
-
Make the sponge cake recipe as instructed, doubling the ingredients. Distribute the batter equally among three parchment-paper-lined (bottoms only) 8-inch cake pans. (I use two 8-inch cake pans and an 8-inch springform pan, using the springform pan layer for the middle cake layer.) Bake and cool as instructed. Freeze the layers wrapped in plastic wrap and then place inside gallon zippered storage bags until ready to assemble. Then, defrost at room temperature.
-
Make a double batch of pastry cream using a double boiler or bain marie (glass bowl over a saucepan of simmering water). Add 1 packet of unflavored gelatin to 1/4 cup room temperature water and allow to bloom/rest for 1 minute. Pour and stir in 1/4 cup boiling water until the gelatin dissolves. Stir into the pastry cream and chill overnight.
-
According to the instructions for the espresso, make 1 cup; refrigerate to cool.
-
To the bowl of your electric mixer, place the block of cream cheese and milk (or mascarpone cheese). Beat on high speed until creamy. Add a 1 to 1-1/2 cups at a time of pastry cream and beat on low until thoroughly combined; refrigerate until needed.
-
Once your cake layers are either cool or defrosted, combine 6 tablespoons of chocolate liqueur with 9 tablespoons of liquid espresso or strong coffee.
-
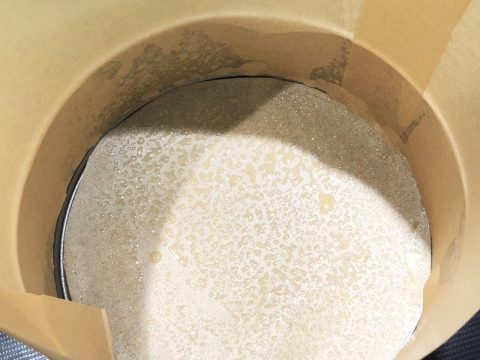
Oil the bottom and sides of an 8-inch springform pan. Line the bottom with parchment paper. Line the sides with parchment paper about 8-inches high. You'll probably need three sheets of paper to do the sides. Oiling between the overlapping pieces will keep them stuck together. Oil the inside of the parchment paper; set aside.
-
Place about 1 tablespoon of espresso on a plate. I use a deep 10-inch paper plate. Place one cake layer on top and baste the top with additional coffee-chocolate liqueur mixture, including the sides. (I like to use a silicone basting brush for this step because it doesn't absorb any liquid.) Try to use about 3 tablespoons of the mixture for each cake layer. To do so, you'll need to try and avoid from basting over already wet areas. If you run out of the mixture, just make a little more. The cake can always withstand more moisture. It's a sponge! Just realize that the cake will also absorb the pastry cream when resting for several days.
-
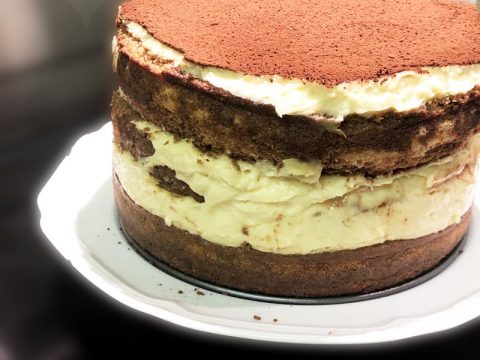
Place the first layer in the prepared springform pan and add 1-1/2 cups of the pastry cream-cream cheese mixture. Distribute evenly. Repeat the above process with the remaining two layers. Dust the top with cocoa powder by adding a teaspoon of cocoa powder to a small mesh strainer. Tap the side of the strainer as you move around the top of the cake. This is done about 8 inches above the cake. Refrigerate uncovered until ready to serve, up to four days.
-
When ready to serve, remove the ring from the springform pan and carefully remove the parchment paper from the sides. Slice as desired and have a large spatula ready to prevent the tall slices from falling over.
Tips
In doubling a recipe, be sure to make the new calculations on a printed version of the recipe. It is extremely easy to make an error if you double the recipe calculations as you make the cake.
To make espresso using espresso powder, add 4 teaspoons espresso powder to 1/2 cup + 2 tablespoons boiling water and stir. (This is stronger than the suggested recipe on the Medaglia D'oro Instant Espresso Coffee bottle.)