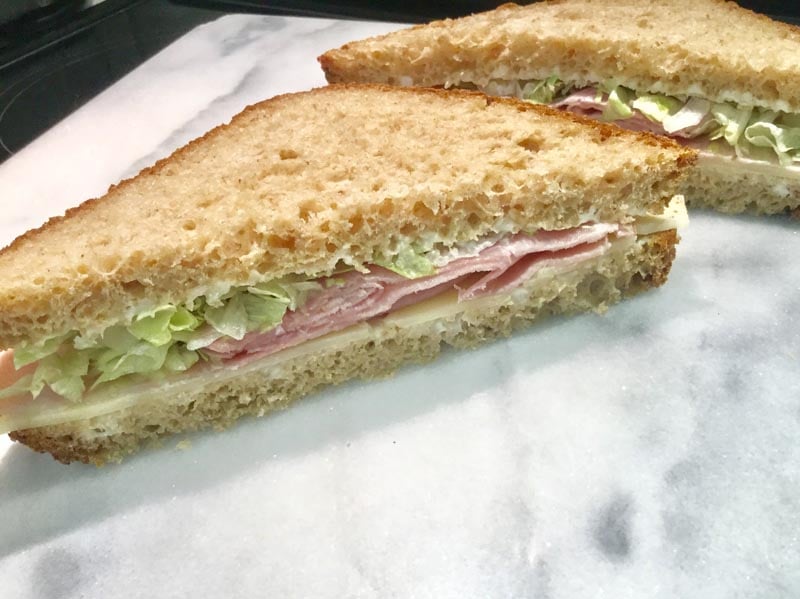
After three attempts, I not only created a gluten free gum free bread recipe but also extended the shelf-life (countertop life) to about three days. Its texture and flavor are wonderful. I created this recipe because xanthan gum and guar gum causes a laxative effect for one of my cookbook recipe testers. I’ve heard this from other people as well. I already have this Glute-Free Paleo-Style Gum-Free Bread Recipe, but I wanted to create a gum free gluten free recipe based on my favorite gluten-free bread recipe, which is available to everyone. Give it a try!

A gluten free gum free bread that turns out similar to commercial brands without the overly processed ingredients such as modified starch.
Ingredients:
- 1 cup + 3 tablespoons water
- 1/4 cup light extra virgin olive oil (or other neutral-flavored oil)
- 1 teaspoon gluten-free apple cider vinegar
- 3 large eggs (or 3 whole egg whites)
- 2 tablespoons honey (or sugar or brown rice syrup)
- 1-1/2 cups gluten-free oat flour (or 1-1/3 cups sorghum flour)
- 1-1/8 cups potato starch (or cornstarch)
- 1/2 cup cornstarch (or more potato starch if corn-free)
- 1/4 cup flax seed meal (optional)
- 1/4 cup non-fat instant dry milk (or use non-fat milk instead of water) (omit for dairy-free)
- 2 tablespoons gluten free psyllium husk powder*
- 2-1/4 teaspoons instant dry yeast
- 1 teaspoon salt
- 2 teaspoons gluten-free oats for top (optional)
Instructions:
- Remove pan from bread machine. Be sure the paddle is already attached.
- Add water, dry milk, oil, vinegar, eggs and honey to the bowl of your bread machine (while removed from the machine).
- In a separate bowl, whisk oat flour, potato starch, cornstarch, flaxseed meal, nonfat dry milk, psyllium husk powder, yeast, and salt, Add the dry mixture to the wet ingredients.
- Snap the bread pan into the machine. Using the menu button on your machine, choose the gluten-free option and press "Start".
- In the beginning of the mixing cycle, use a silicone or rubber spatula to scrape the flour from the sides of the pan.
- Once the mixing cycle ends, remove the mixing paddle. This will prevent a large hole from forming in the bottom of your bread. Smooth out the top using your spatula.
- If using oats or seeds to top your bread, add them now and pat them into the bread using your fingers dipped in water.
- Once the baking cycle completes, transfer the loaf from the pan to a wire rack to cool Upside down, completely, at least 2 hours. If the crust is too crunchy for you (it will soften a little on its own), use a clean tea towel to cover the top and sides (not bottom) while it cools on the rack. Test for desired softness. Then remove and allow to cool completely.
- Once cooled, remove the paddle using a steak knife (if you've left it in). Slice the bread using an electric slicer, electric knife, or serrated knife. While you can store the bread on the countertop overnight, it is always best to slice and freeze any gluten-free bread.
- Oil a 9 x 5-inch loaf pan, dust with oat flour, and set aside.
- Add the water, oil, vinegar, eggs and honey to the bowl of your stand mixer fitted with the whisk attachment.
- In a separate bowl, whisk oat flour, potato starch, cornstarch, flaxseed meal, nonfat dry milk, psyllium husk powder, yeast, and salt.
- Add the dry mixture to the wet ingredients. Beat on medium-low speed 6 minutes.
- Transfer the dough to the prepared loaf pan, and using a rubber spatula, smooth out the top. Allow to rise in a warm environment, about 80°F or until just over the rim of the pan, about 30 minutes.
- Preheat the oven to 325°F while bread continues to rise on top of the stove.
- Bake for 1 hour 20 minutes, covering with aluminum foil once it reaches a deep golden brown.
- Transfer the loaf from the pan to a wire rack to cool completely, about 2 hours. If the crust is too crunchy for you, using a stick of butter, rub it over the top of the crust. It will soften over time.
- Slice the bread using an electric slicer, electric knife, or serrated knife. You can store the bread tightly sealed on the countertop up to three days or freeze it for longer lasting freshness.
Tips
*You can use just 1 tablespoon psyllium husk powder, but then it won't have that stiffer/spongy texture like sourdough bread, Udi's, or Schar's new Artisan breads. In addition, the bread slices will need to be frozen until ready to use.


Question – is Gum free flour the same as gluten-free flour? Is oat flour gum free?
Patricia,
Usually, when I refer to gum free flour I am referring to a flour blend that does not contain any gum like xanthan or guar.
I hope this helps clarify things.
Carla
Going to make this, this weekend. ?