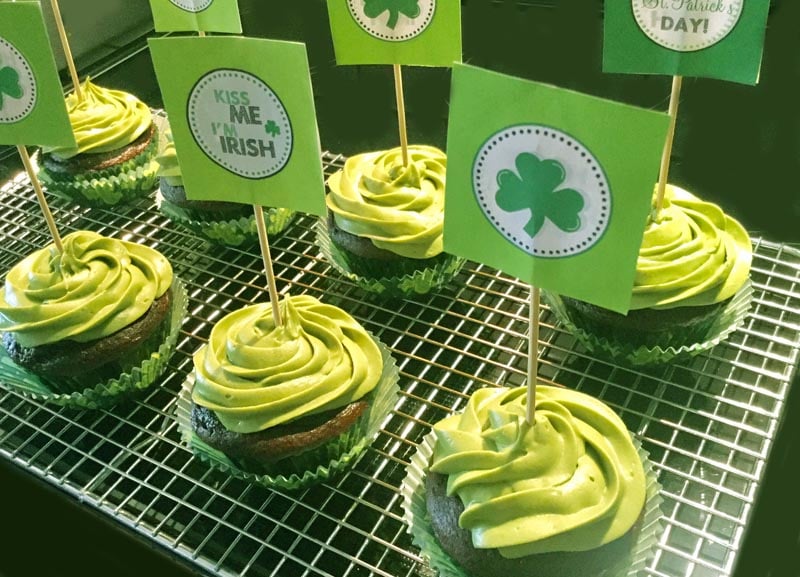
These St. Patrick gluten free cupcakes turned out delicious, as well as festive! I teach you how to make them as well as the flags. You may use the new Gluten Free Buttermilk Chocolate Cupcake Recipe that I have included, which makes nine cupcakes or the Gluten-Free Dairy-Free Chocolate Cake Recipe (which makes more). I have frosting suggestions for both as well.

A moist and flavorful gluten free St. Patrick's Day cupcake or anytime of year (without the green food coloring).
Ingredients:
- 6 tablespoons unsweetened cocoa powder (I used 1/4 cup regular + 2 tablespoons Dutch processed)
- 1/4 cup + 3 tablespoons boiling water
- 3 tablespoons butter, room temperature
- 1/2 cup granulated sugar
- 1/4 cup + 2 tablespoons dark brown sugar, packed firmly
- 1/4 teaspoon salt
- 1 large egg
- 3/4 cup Carla's Gluten Free Self-Rising Cake Flour Blend recipe
- 1/4 cup + 2 tablespoons buttermilk
- 1/4 cup gluten free mini chocolate chips or chopped chocolate (optional) (Enjoy Life for dairy-free)
- 1 recipe Cream Cheese Frosting*
- Gluten Free green food coloring, as desired (I used Organic Seelect brand; others include AmeriColor and McCormick)
- 1/2 teaspoon pure almond extract (optional)
- Print out 2 sheets Irish Stickers here
- 9 small wooden skewers or toothpicks
Instructions:
- Preheat oven to 350 degrees F.
- Line 9 muffin cups with liners.
- In the bowl of your electric mixer, add cocoa powder and boiling water; whisk until combined.
- Add butter, sugars, and salt; mix until sugar dissolves.
- Best in the egg, then the buttermilk.
- Add the flour blend alternating with the buttermillk, beginning and ending with flour, mixing after each addition until smooth, scraping sides as needed
- Distribute among paper liners and rap I'm the counter to even out tops.
- Bake 22 minutes or until a toothpick inserted near the center of a cupcake comes out clean.
- Cool 10 minutes in the pan on a wire rack. Then, transfer the cupcakes to a wire rack to cool completely.
- Make the cream cheese frosting as directed in the above link. Scoop it into a pastry bag or cupcake decorator device and fit a large star tip. Working from the outside top of the cupcake pipe out frosting in a circular motion, working your way to the center. Stop piping and quickly pull up and away.
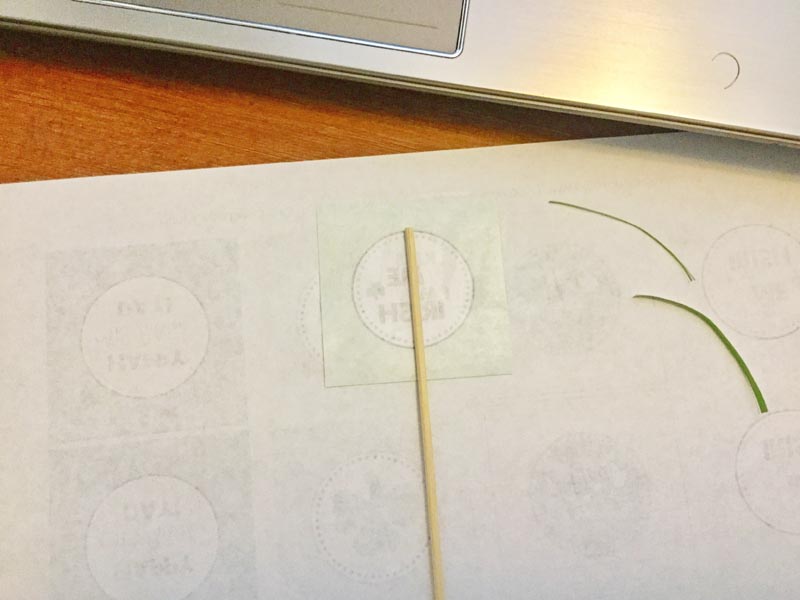
- Print out 2 sheets of Irish stickers, landscape; cut out squares. Using a glue stick, cover the back of one square. Place the skewer at the top of the circle (that you can see through the other side of the paper) and cover with another square, wrong sides together.
- Stick a skewer with the flag/sticker in the center of each cupcake. Allow the frosting to set.
- Cover and refrigerate any cupcakes not eaten the same day. If you wish to seal each cupcake separately with the flag inserted, add a cupcake to a ziplock sandwich bag and zip up on the left and right sides.

Tips
*If you are dairy-free, use pureed avocado and confectioners' sugar for the frosting, along with extract to taste. It really does taste almost the same.


