
Rather than go through the time and effort of making a layer cake, this gluten free red velvet snack cake bakes in just 35 minutes. You can either serve this cake with or without frosting. It makes the perfect snack without frosting and a decadent dessert with. Enjoy!
Links You May Need:
Carla’s Gluten Free All-Purpose Flour Blend Recipe
Cream Cheese Frosting or Homemade Whipped Cream
Dairy-Free Buttermilk Substitute – Faux Buttermilk
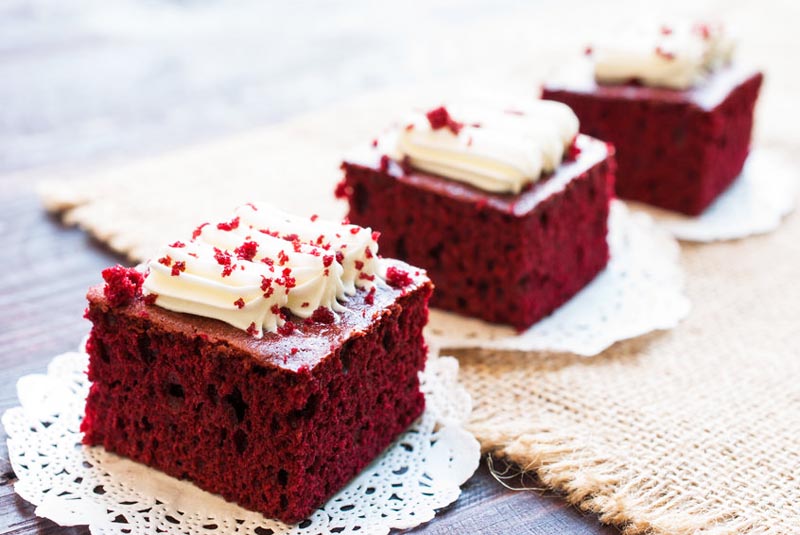
Gluten Free Red Velvet Snack Cake
Red velvet is a classic cake that almost everyone enjoys. This cake can easily be made in advance and frozen. Just defrost and frost. Then, you're ready to serve!
Prep Time 15 minutes
Cook Time 35 minutes
Cool Time 1 hour
Total Time 1 hour 50 minutes
Servings 9
Ingredients
- 1 cup + 2 tablespoons Carla's Gluten Free All-Purpose Flour Blend recipe linked above
- 1 cup granulated sugar
- 3 tablespoons unsweetened natural cocoa powder plus more for dusting
- 1/2 teaspoon baking soda
- 1/2 teaspoon salt
- 1 large egg (or 2 tablespoons liquid from a can of cannellini beans + 1 tablespoon additional oil)
- 3/4 cup neutral-flavored oil plus more for the pan
- 1/2 cup low-fat buttermilk for dairy-free, see above link
- 1-1/2 tablespoons red food coloring
- 1-1/2 teaspoons apple cider vinegar
- 1 teaspoon vanilla
- 1 recipe Cream Cheese Frosting or Whipped Cream recipes linked above
Instructions
-
Preheat oven to 350ºLightly oil an 8-inch-square baking dish (keeps the parchment paper still); line with parchment paper, leaving enough overhang to grab the edges when removing. Oil the parchment paper and dust with cocoa powder.
-
Sift the flour, sugar, cocoa powder, baking soda, and salt into the bowl of your electric mixer.
-
In a separate bowl, whisk together egg, oil, buttermilk, food coloring, vinegar, and vanilla. Add to the flour mixture and beat on medium speed until the batter is thick and smooth, 2 to 3 minutes. Pour into the prepared dish, and run a butter knife through the batter to remove any large air bubbles. Bake until the cake springs back when lightly touched and a toothpick inserted in the center comes out clean, 30 to 35 minutes.
-
Transfer the cake to a wire rack to cool 10 minutes.
-
Lift the cake out of the pan using the parchment paper overhangs. Lay the parchment paper flat to allow air to circulate around the edges. Once cool enough to handle remove the paper as soon as possible and allow the cake to cool completely.
-
Meanwhile, make the frosting as instructed at the above link. Once the cake is cool, slice into nine squares and pipe out your desired design (I like using a star tion top of each piece prior to serving.