
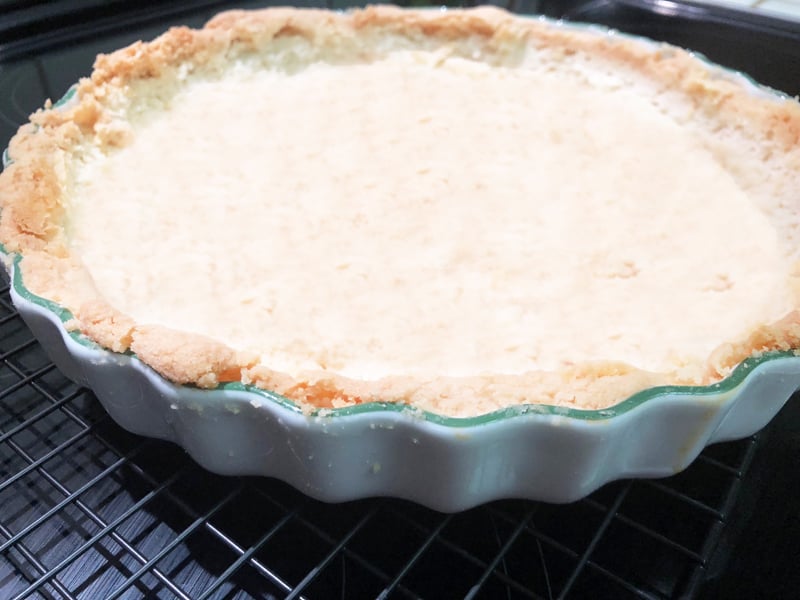
Looking for a flaky yet crunchy gluten free tart crust that can withstand the moistest fillings and not become soggy? Look no further. This is the crust for you! Once cooled, this tart crust is crunchy, much like a crunchy cookie. Simply put, it is a flavorful, sweet, crunchy crust. There is no evidence that your dessert is gluten free.
Water:
The less water you use in a pie or tart crust, the flakier and more tender the crust. Only use water to get the dough to come together. However, if your pie crust contains lots of fat, butter in this case, the dough should come together easily without any water at all. Therefore, you will not see water in this recipe. If you do need to add water due to packing your measuring cup too tightly with flour, be sure to use ice cold water and only add one teaspoon at a time, pulsing after each addition.
Filling in Advance:
While all of the sugar added to this crust makes it crunchy like a cookie, it can be difficult to slice if just filled one day prior to serving. By the second day, the crust is easily sliced. For same day or one-day serving, feel free to reduce the sugar to as little as 1/4 cup.
Crunchy Gluten Free Tart Crust - Sweet
Ingredients
- 12 tablespoons unsalted butter, at room temperature (or dairy-free margarine - Smart Balance) (6 ounces or 1-1/2 sticks)
- 1/2 cup granulated sugar
- 1/2 teaspoon pure vanilla extract
- 1-1/2 cups Gluten Free All-Purpose Flour Blend plus more for dusting
- 1/8 teaspoon salt
Instructions
-
Add the butter and sugar to the bowl of your food processor. Process until creamy. Add the vanilla and pulse to combine.
-
Add the flour and sprinkle the salt on top as to distribute evenly. Pulse until the dough just starts to come together. Do not over mix.
-
If using a glass dish, preheat the oven to 300ºF. For a metal pan, heat to 325ºF.
-
Dust a surface lightly with the flour blend and transfer the dough to this surface. Shape the dough into one round disk. Press the dough into the bottom and up the sides of a 10-inch-round tart dish/pan. Using a paring knife, trim off the excess pie dough from the rim of the dish/pan.
-
Line the tart dough with a sheet of parchment paper that has been heavily oiled and dusted with flour to prevent the dough from sticking to the paper. Fill with dry beans or dry rice up to the top of the crust. (This keeps the sides of the crust from melting and falling down. I usually add a 9-inch cake pan in the center and beans around the pan.) Bake for 20 minutes.
-
Increase the temperature to 350ºF. Remove the crust from the oven. Remove the cake pan (if using), beans, and parchment paper. Return to the oven and bake for 25 minutes.
-
Remove the crust from the oven; set the dish/pan on a wire rack and allow to cool.
-
Fill with a note bake filling or one that needs to bake further. For fillings that need to be baked, cover the edges of the crust with foil or a silicone baking crust ring.
-
If using a tart pan with two parts (side ring and bottom), remove the side ring prior to slicing and serving.