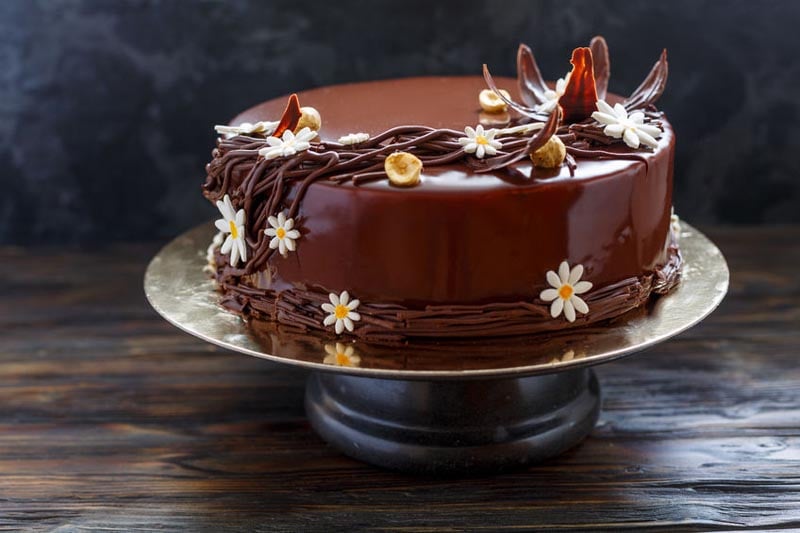
Did you ever wonder how pastry chefs make that mirror glaze finish on cakes? It is much easier than you’d imagine and you can find all of the ingredients right in your local grocery store. It’s a bucket list item for all home bakers. The best part of this recipe is that instead of using sweetened condensed milk or heavy cream, this recipe is completely dairy-free!
Want really high-quality cocoa powder that’s really dark?
Droste – package labeled gluten free
Valrhona (expensive) (I checked with someone with celiac disease. She does not react to this product.)
Van Houten (Begium) -(****may contain traces of gluten****) – the originator of Dutch processed cocoa powder.
Links You May Need:
Glucose Syrup (or light corn syrup)
5-Star Chocolate Mousse (just an idea – see tips section)
Chocolate Mirror Glaze – Miroir Glaze (Glacage)
Ingredients
- 1 cup water
- 2 cup granulated sugar (organic, for vegan)
- 1/2 cup Dutch-processed cocoa powder
- 2 envelopes gluten free unflavored gelatin powder 2-1/2 teaspoons (Knox)
- 2 tablespoons glucose syrup used for baking or light corn syrup, for vegan
- 1 teaspoon pure vanilla extract
Instructions
-
Before you make the glaze, consider freezing your cake, or at least refrigerating it for many hours (if that’s an option). The mirror glaze needs to set quickly to form a nice thick layer on the cake. Be sure to coat your cake, prior to chilling, with a thin coating of chocolate ganache or buttercream frosting. You need to create a smooth surface on all sides of your cake.
-
In a saucepan over medium heat, add 1 cup water, sugar, and glucose, in that order. Stir and bring to a boil. Boil for 30 – 45 seconds and remove from the heat.
-
To a small bowl, add 3 tablespoons water and sprinkle the 2 packets of gelatin on top. Do not stir; set aside. Do not add any additional water. (Water is not friendly to chocolate. So, keep the water to a minimum.)
-
Sift the cocoa powder into a heat-proof bowl and pour in the sugar mixture a little at a time while constantly whisking.
-
Add the gelatin and vanilla and whisk until the gelatin dissolves; set aside to cool to room temperature.
-
Once the glaze cools, strain it through a fine-mesh strainer, into a clean bowl. (Do not skip this step. Straining not only removes undissolved cocoa powder and gelatin, but it removes the many bubbles that form from whisking. If you don’t remove those bubbles, you will not have a smooth, mirror glaze.)
-
Place a sheet of plastic wrap directly on top of the glaze; set aside.
-
When you’re ready to glaze your cake, remove it from the refrigerator or freezer and set it on a wire rack with a baking sheet underneath. If the cake is on the bottom of a springform pan plate, you can set it on top of a bowl. If the cake is frozen solid, you don’t need anything else. Make sure the cake is smooth. You can dip an offset spatula into boiling water to smooth out the crumb coating (ganache or buttercream).
-
Now here’s the fun part! Don’t stress. It’s easy. Just make sure you have more glaze than you think you need. Beginning from the center of the cake, begin pouring the glaze. Go round and round and allow the glaze to drip off onto the baking sheet. Don’t hesitate to pour the glaze on the cake two to three times. You want to create a nice thick layer. If you’re using a bowl as a stand, using your fingers or an offset spatula, remove any drips from the bottom edges.
-
Using two offset spatulas or two long knives, transfer the cake, while still wet, to your cake board or serving plate.
-
Decorate any way you desire.
Tips
One cake you may wish to try is to use this glaze on a single layer of chocolate sponge cake placed into a springform pan. Then, top it with Five-Star Chocolate Mousse. Prior to glazing, warm the sides of the springform pan using a kitchen torch on low. You can freeze this cake and then while still frozen, top with the chocolate mirror glaze recipe. Perfection!
Prior to making the chocolate mirror glaze recipe, you can make a colored glaze and pour some colored lines or decorations into the cake and watch it take another form as it drips down the sides of the cake. If your cake is frozen, it may not drip at all and keep its shape.


