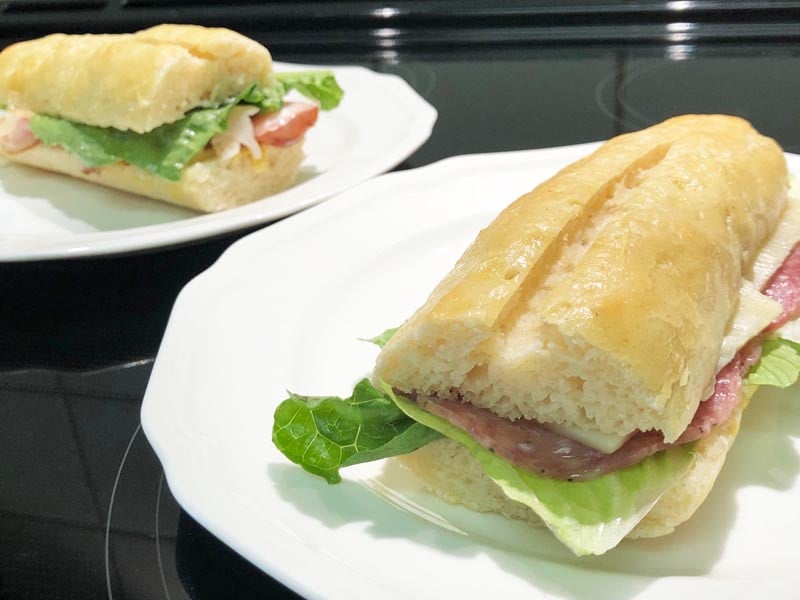
Looking for an amazing sandwich roll recipe? These copycat gluten free Subway rolls are it! This is one of those recipes you’ll make over and over again. They are such a treat. I recently used them to make sandwiches but will use them to make my Thanksgiving dressing and for garlic bread. I haven’t been this excited since I discovered Schar gluten free parbaked baguettes, but this copycat recipe is moist and contains healthier ingredients. So, they’re better though slightly heavier.
Check out their texture at Gluten Free Subway Rolls Video.
Egg-Free?
See the egg-free version in the tips section below the recipe.
Gluten Free Subway Rolls Copycat
Ingredients
For the Rolls:
- 3/4 cup potato starch (4.7 ounces)
- 3/4 cup tapioca flour (3.3 ounces)
- 3/4 cup white rice flour not superfine (3.7 ounces)
- 1/2 cup gluten free oat flour (Bob’s Red Mill) (1.7 ounces) (or sorghum flour)
- 2 teaspoons instant dry yeast
- 1-1/2 teaspoons xanthan gum
- 1 teaspoon salt
- 1 cup + 2 tablespoons nonfat milk or rice milk (Add 1 additional tablespoon if using sorghum flour.)
- 2 tablespoon dairy-free margarine melted and slightly cooled (Smart Balance) (or unsalted butter or ghee)
- 2 tablespoon neutral-flavored oil (extra light olive, sunflower, grape seed, avocado, canola)
- 2 tablespoons honey (or agave)
- 1 large egg*
- 1 large egg white*
- 1/2 teaspoon apple cider vinegar
For the Egg Wash:
- 1 large egg
- 1 tablespoon full-fat coconut milk or heavy cream
- 1/2 teaspoon water
Instructions
-
In a medium-size bowl, add all of the dry ingredients and whisk to combine; set aside.
-
To the bowl of your mixer fitted with the balloon/whisk attachment, combine all of the wet ingredients.
-
Add the dry mixture to the wet and beat on medium speed for 4 minutes.
-
Place the dough in one of the corners of a gallon-size zipper storage bag and refrigerate overnight. (Mine was in the refrigerator for 12 hours. I’m pretty sure 2 – 3 days will be the longest you can store this dough in the refrigerator. The longer you refrigerate this dough, the stronger the sourdough flavor will develop.)
-
Line a triple-sectioned baguette pan with a sheet of parchment paper 12 to 13-inches wide. (Mine was 13-inches wide.) Lay it across a baguette pan (preferably perforated). Tuck the ends under and lay it on a baking sheet.
-
Remove the dough from the refrigerator. The dough should have doubled in size. Snip off about 1-inch to 1-1/4-inches off the corner nearest the dough. Pipe out one-third of the dough in each of the three sections. Set aside to rise for 30 minutes in a warm environment, about 80⁰F.
-
Whisk together all of the egg wash ingredients, egg, coconut milk, and water. After about 30 minutes of rising, using a pastry brush, baste the egg wash on top of the loaves; continue to rise for about another 25 minutes. You can tell when the dough is risen enough when the tiny holes on the top become larger. At this time, preheat the oven to 375⁰F.
-
Once risen, baste them one more time with the egg wash. Then, bake the rolls on the center shelf of your oven 8 minutes.
-
Open the oven door and slide out the shelf. Quickly slice into the center of each roll about 1/8 to 1/4-inch deep, leaving about 1-1/2 inches on each side alone. (The slit allows the rolls to expand further during baking.) Bake for an additional 12 minutes or until lightly golden brown.
-
Remove the pan from the oven and immediately transfer the rolls to a wire rack to cool. You may serve them slightly warm or at room temperature.
-
Freeze any rolls that you will not consume within 24 hours. (The sooner you freeze them the better. Never refrigerate gluten free bread. As with all bread, refrigerators stale baked goods faster than at room temperature. Due to the lack of preservatives, homemade bread stales even more quickly.)
Tips
*Replace the egg and egg white with 1/4 cup liquid from can of cannellini beans + 1 tablespoon additional fat (butter, hydrogenated palm oil, margarine, coconut oil, etc.


This is great, as I just purchased a submarine sandwich rolls baking pan!!
“See the egg-free version in the TIPS section below the recipe” is printed above the recipe, but there is no TIP section.
Sorry, Connie! That line was all messed up. The Tips section is now updated.
Enjoy,
Carla