
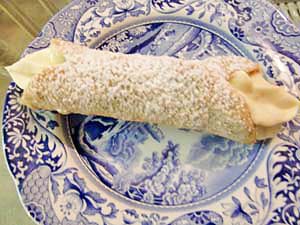
Cannoli is a Sicilian dessert consisting of a crispy tube shell filled with sweet ricotta cheese filling. My aunt would make several variations for special occasions. You can add dried fruit, glazed cherries, pistachio nuts, or chocolate chips to the filling or use as garnish. They make you feel as if you were in Italy.
Story Behind the Recipe:
Someone doing a search for “purchase gluten free cannoli shells” landed on my blog today. This prompted me to research whether or not you can purchase them or not. The only thing I found was a waffle type pizzelle made into the shape of a cannoli shell. Pizzelles are actually a cookie. Well, I got to work in my kitchen right away and came up with a successful gluten free cannoli shells recipe. Try it! I really think you’ll be pleased.
I started with my traditional cannoli shells recipe. I left out the cocoa powder, as I wanted to make a traditional, yet gluten free cannoli shells recipe. Though traditional recipes do not call for cinnamon, I just love cinnamon cannoli, therefore, left it in this recipe. I also cut the recipe in half, as I did not want to test such a large batch.
Link You May Need:
Carla’s Gluten Free All-Purpose Flour Blend Recipe

These gluten free cannoli are so good that you can serve them to your gluten eating friends and family and they'll never know!
Ingredients:
- 1-1/2 recipes Rictotta Filling
- 1 large, cold egg
- 3-1/2 tablespoons ice water
- 1/2 teaspoon pure vanilla extract
- 1/2 cup white or brown rice flour*
- 1/4 cup tapioca flour*
- 1/4 cup potato starch*, plus more for dusting
- 3/4 teaspoon xanthan gum*
- 1 tablespoon granulated sugar
- 1/16 teaspoon salt
- 1/2 teaspoon ground cinnamon
- 1/2 teaspoon gluten-free cocoa powder (optional)
- 1 tablespoon vegetable shortening
- 1 egg white, at room temperature, beaten, for brushing
- Peanut oil or light olive oil, for frying
- Confectioners’ sugar, for dusting (optional)
Instructions:
- In a medium-size bowl, whisk the rice flour, tapioca flour, potato starch, xanthan gum, sugar, salt, and if desired, cinnamon. If you wish to make darker shells, add cocoa powder; set aside.
- Lightly beat the egg. Whisk in ice water and vanilla.
- Add the shortening. Using a pastry cutter or two knives, cut shortening into the dry mixture until fine crumbs form.
- Create a well in the center of the dry mixture; add egg mixture. Using your hands, combine to form a ball. If the dough is too dry, add more ice water 1 teaspoon at a time. If it is too wet, add a bit more potato starch.
- Place the dough on a heavily potato-starch-dusted surface, and knead until smooth. Add additional starch as needed.
- Cut the dough into 4 pieces. Place three pieces in a resealable, zipper storage bag; set aside.
- Using a rolling pin, roll the fourth piece of dough out onto the floured surface, to about 1/16-inch thick. Cut the dough into 3-1/2-inch circles using a cookie cutter, biscuit cutter, or glass. Set the circles aside. You may stack them as the circles do not stick together. Scrape any stuck-on dough from the rolling pin and dust the surface with additional tapioca flour, as needed.
- Place a wire rack or steamer at the bottom of a stockpot or other large pot. Alternatively, use a deep-fryer with a basket. Add enough oil to cover the cannoli shell by at least 1-inch. Preheat oil to 375°F.
- Oil the outside of 7/8-inch cannoli forms (metal tubes) using gluten-free non-stick/oil spray or standard cooking oil; set them aside.
- Working in batches, roll each of the circles out into an oval shape, making them a bit thinner, no longer than the cannoli form, and 4 – 5-inches wide.
- Wrap the dough around a cannoli form and before overlapping it, baste the ends that will overlap with a bit of egg white. Press firmly to seal. Repeat until all of the forms are wrapped in dough.
- Deep fry each shell until they become light brown in color, 1 - 5 minutes. Allow any excess oil to drip out of the center of the form and back into the hot oil. Transfer the cannoli shells on the forms to a heat-resistant bowl, vertically, allowing oil to drain.
- Using at least two layers of paper towels, hold the cannoli shell gently in your hand. Using a couple of layers of paper towels in your other hand, slide out the cannoli form. If a shell sticks to the form, gently twist the form a fraction of an inch. (Do not twist the cannoli shell or it may break.) Use caution to prevent burning yourself.
- Set shells on a rack to cool. Set forms in the freezer to cool between uses. Do not leave them in the freezer for too long, as too much moisture will form. Repeat above steps until you fry all of the cannoli shells. (There is no need to pre-oil the forms after the first time.)
- Scoop the filling into a pastry bag or gallon-size storage bag with one corner cut off about 1/3-inch. Pipe filling into each end of the shells and garnish with chocolate shavings, chocolate chips, chopped pistachio nuts, gluten-free Maraschino cherry halves, or dried fruit. Fill the shells right before serving or they become soft and chewy.
- To store for future use, leave them out overnight. Store shells in resealable, zipper storage bags along with a paper towel to absorb any moisture. Place the bags in airtight containers to avoid being crushed. Store in a cool, dry place up to 6 weeks.
Tips
*For a more gluten-like, slightly chewy texture, use 1 cup + 34 teaspoon Carla's Gluten Free All-Purpose Flour Blend recipe (linked above) to replace all of the dry ingredients with a * in the ingredient list.
Variation: To make chocolate cannoli shells add a total of a tablespoon of pure cocoa powder to the dry ingredients.
Once you cut your circles, you will have scraps left over. Just place these pieces in the resealable, zipper storage bag. After you use all of your dough, form a ball with the scraps. Create a well in the ball of dough. Add additional ice water and knead. Use this dough to roll and cut out more circles.
If you do not have a deep-fryer, you may use a heavy pot. However, it may be difficult to keep the oil at a steady temperature. Just expect to test the temperature of the oil often using a thermometer, and allow the oil to warm or cool, as needed. Another option is to use an electric skillet.
If you prefer to use my Gluten-Free All-Purpose Flour Blend Recipe, be sure to use tapioca flour instead of the cornstarch substitute only because the cornstarch will make them blond. It doesn't brown well in this recipe. However, you can certainly add additional cocoa powder to make them darker. Note that the use of cornstarch also makes them less crisp.
For a gluten-like, slightly chewy texture, did you mean 1 cup + 34 t Carla’s GF all-purpose flour? That’s a lot of flour compared to what’s in this recipe. Is this correct?
Replace the 1/4 cup + 1/4 cup + 1/2 cup flours and starches with 1 cup + 3/4 teaspoon Carla’s Gluten Free All-Purpose Flour Blend Recipe.
Enjoy!
Carla
Is there a substitute for potato starch? Very allergic to potato, corn, coconut, and peanuts/nuts…i can do the other ingredients but I’m assuming the potato is there for texture?
Kari,
The usual substitute for potato starch is cornstarch. Since you are allergic to both, I can only suggest experimenting with tapioca flour.
Good luck,
Carla
I was searching for a gf bechamel sauce for a moussaka recipe this site came up. I was pleasantly surprise at all the other options I had for pastries. I couldn’t get the cannoli shell receipe. I’m the only one in my household with celiac. I don’t try many recipes. I love cannoli and would like to plan then for the holidays. You did give me so many desserts to choose from. Thanks
Hi Awilda,
It’s funny you should ask about this recipe today. I just ran across this page earlier today. When I was updating the recipe I accidentally changed the recipe code number. I had contacted someone earlier today to find out how to figure out the proper code. Meanwhile, you provided me with more incentive to figure out the correct code myself, and voila! Here it is…all back up and ready for you to make!
Thank you for your patience.
Enjoy!
Carla
This looks so yummy! I’m definately going to try it. Cooking, baking plus buying already made gluten free has opened my world up when it seemed pretty glum when I first discovered I was gluten intolerant.
Great, Bernie!
I hope you enjoy them. My entire family does, and most of them are not gluten-free!
Just make sure you make plenty of dough, as it may take some time to get the hang of how to wrap them, as well as how long to cook them so they don’t burst open.
Carla
How can you store unfilled shells and how long will they last?
Hi Diana, I have had some stored for about 3 months and they are still good. It will depend upon the temperature of your environment. I suggest about 3 weeks to be on the safe side.
You think I can use a “flax egg” or “chia egg” instead in this one?
Melissa
I would definitely give it a try the flax egg, as the deep frying will probably puff it out enough! You may wish to add some baking soda, though.
i love canolies and haven’t had them in forever