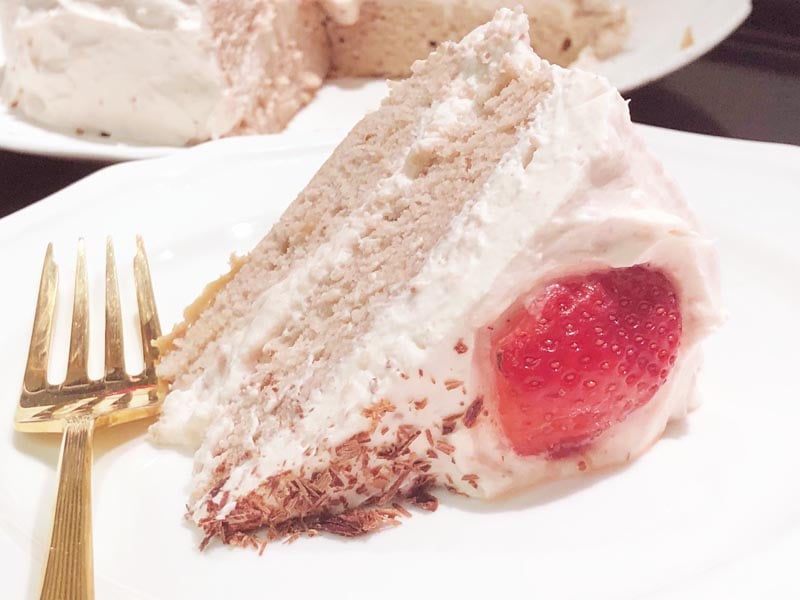
My gluten-eating neighbors not only raved about this cake but asked for the recipe. You know it’s good when this occurs! You can easily double this and make a larger cake in an angel food cake pan like the other Gluten Free Chiffon Cake Recipes. (Be sure to follow their cooling instructions.) Angel food cake pans create a fluffier cake. However, if you prefer a layer cake or don’t have an angel food cake pan, an 8-inch spring-form pan or two round cake pans work too. Top and layer with strawberry whipped cream or Ermine Frosting for dairy-free and egg-free.
Learn how to wrap your cake pans and how to make better cakes! Read the article: How to Make Better Cakes: Soft Sides, Less Brown, and Less Domed.
Links you’ll need:
Carla’s Gluten Free All-Purpose Flour Blend Recipe
Strawberry Whipped Cream Recipe
OR
Gluten Free Buttercream Recipes + optional strawberry flavoring like LorAnn Oils Strawberry Emulsion (which is natural and artificial).
Silk Dairy-Free Heavy Cream, for dairy-free.
Gluten Free Strawberry Cake Recipe
Ingredients
- 3 large eggs* separated and left out until room temperature
- 1/8 teaspoon cream of tartar
- 2 tablespoons granulated sugar
- 2/3 cup pureed fresh strawberries Sam's Club Organic Frozen**, defrosted
- 1/2 cup granulated sugar divided
- 1/4 cup vegetable oil
- 1 cup Carla’s Gluten Free All Purpose Flour Blend Recipe 140 g
- 3/4 teaspoon gluten free baking powder
- 1/4 teaspoon salt
- 1 recipe Strawberry Whipped Cream optional (see above link)
- 1 recipe Strawberry or Vanilla Italian Buttercream optional (see above link)
Instructions
-
Preheat the oven to 325°F with a shelf at the very bottom of the oven. Oil one 8-inch spring-form pan; line the bottom with parchment; oil the top of the parchment; set aside. (To make a 4-layer 4-inch cake, oil four 4-inch spring-form pans and make 2/3 of this recipe.)
-
In the bowl of your electric mixer, add the egg whites and cream of tartar. Beat on medium speed, adding 2 tablespoons sugar a little at a time. Continue to mix until the egg whites reach stiff peaks. If you only have one mixing bowl, transfer to another bowl; set aside.
-
ln the original mixing bowl or another clean one, add strawberry puree, 1/2 cup sugar (1/3 cup for a 4-inch cake), oil, and egg yolks. Beat on low speed until combined.
-
In a separate bowl, sift together the flour blend, baking powder, and salt twice. Then, sift the mixture a third time right on top of the wet mixture in the mixing bowl. Beat on medium speed until thoroughly combined.
-
Fold one-third of the egg whites into the batter at a time, turning the bowl while folding until no white streaks remain before adding any more.
-
Spoon the batter into the prepared pan. (Distribute evenly among the 4-inch pans, if using. Weighing the each pan and its batter is helpful to evenly distribute. They should weigh a little over 100 grams, if memory serves me correctly. Just take some from another until they all weigh about the same.)
-
Using a butter knife, swirl into the batter all the way around to remove any large air pockets. Smooth out the top using a silicone spatula. Shake the pan to even the top out further. About 5 minutes of resting also creates a smooth top.
-
Bake on the lowest rack of the oven for 35 - 40 minutes for an 8-inch cake (or 15 minutes for a four-layer 4-inch cake) or until the top springs back quickly when lightly touched with your fingers.
-
Remove the pan from the oven and allow to cool for 10 minutes. Remove from the pan and transfer to a wire rack to cool, about 2 hours (30 minutes or more for 4-inch cakes).
-
Slice with a serrated knife towards yourself, not in a sawing motion. Dip your knife in warm water for smoother slices.
-
Slice in half !and fill with and frost with strawberry whipped cream, plain whipped cream, or your choice of buttercream frosting.
Tips
*You can substitute the egg whites with 6 tablespoon liquid from a can of cannellini beans plus 3 tablespoon fat such as softened butter, oil, or heavy cream.
**Sam's Club carries 3-pound packages of sliced frozen organic strawberries for $7.48.


I did this recipe 2xs and both times it failed. There is some issues with the recipe that cause the cake to be to thin, even when used the 8ich round spring form pan. Hard and crunch on the outside and not done on the inside.
Denise,
I can only assume that you did not use my homemade gluten-free flour recipe linked above. It sounds like you used a flour blend that did not contain any gum such as xanthan. I have made this recipe by following the above instructions myself, after I develop the recipe, and had no difficulties. In addition, I have heard back from someone else who made this recipe with rave reviews. If for some reason you did use my flour blend recipe, please let me know and I’ll see if I can troubleshoot this for you.
Carla
This cake is so delicious!!!! I wanted a summer treat, and the natural strawberry flavor is just the thing. My cake did not turn out quite as pretty; it started to shrink slowly as it cooled. I read somewhere that it helps if you drop the pan from knee height to the floor. Not sure if that helps with deflating, but I will try next time. I made the strawberry whipped cream, as suggested, and topped it with fresh strawberries. This cake is a must for the summer. Thank you, Carla!
Mistiraemerrill,
I am so glad you enjoyed this cake. It is my new favorite cake.
Dropping the cake pan prior to baking will result in a dense cake. You want some of those air bubbles to remain in the cake. Instead, next time, bake the cake a little longer to prevent a lot of shrinking. If you wrap the sides of the cake with foil with damp paper towels inside, the sides will stay soft.
Carla